• Skip to primary navigation
  • Skip to main content
  • Skip to primary sidebar
  • Skip to footer
The Redhead Baker logo
  • Home
  • Recipes
  • About Me
  • Contact
menu icon
go to homepage
subscribe
search icon
Homepage link
  • Home
  • Recipes
  • About Me
  • Contact
  • ×

    Home » Recipes » Tips & Tricks

    How to Write with Chocolate

    Published: Feb 14, 2013 · Modified: Jan 25, 2016 by Coleen · This post may contain affiliate links.

    writing-with-chocolate-3

    Are you planning a special dessert for Valentine's Day dinner? Want to make it extra-special? Write a short, sweet message around the edge of the plate in chocolate.

    Here's what you'll need:

    • about 2 ounces of semisweet chocolate, finely chopped
    • a parchment paper cone (instructions below)
    • a clean dry, plate

    Melt the chocolate. I recommend using a double boiler, because you want to just warm it to melting, not get it screaming hot. Place about an inch of water in a large saucepan, and bring it to a simmer. Then turn the heat off, and place the chopped chocolate in a medium mixing bowl over the hot water. The bottom of the bowl should not touch the water. Stir frequently. When there are just a few lumps left, remove it from the heat and stir until smooth.

    Now, make your parchment cone. Wilton sells pre-cut triangles, or you can cut your own triangle from a sheet of Reynolds baking parchment. It doesn't need to be huge. The triangle pictured below is 15 inches across at the base.

    parchment cone 1


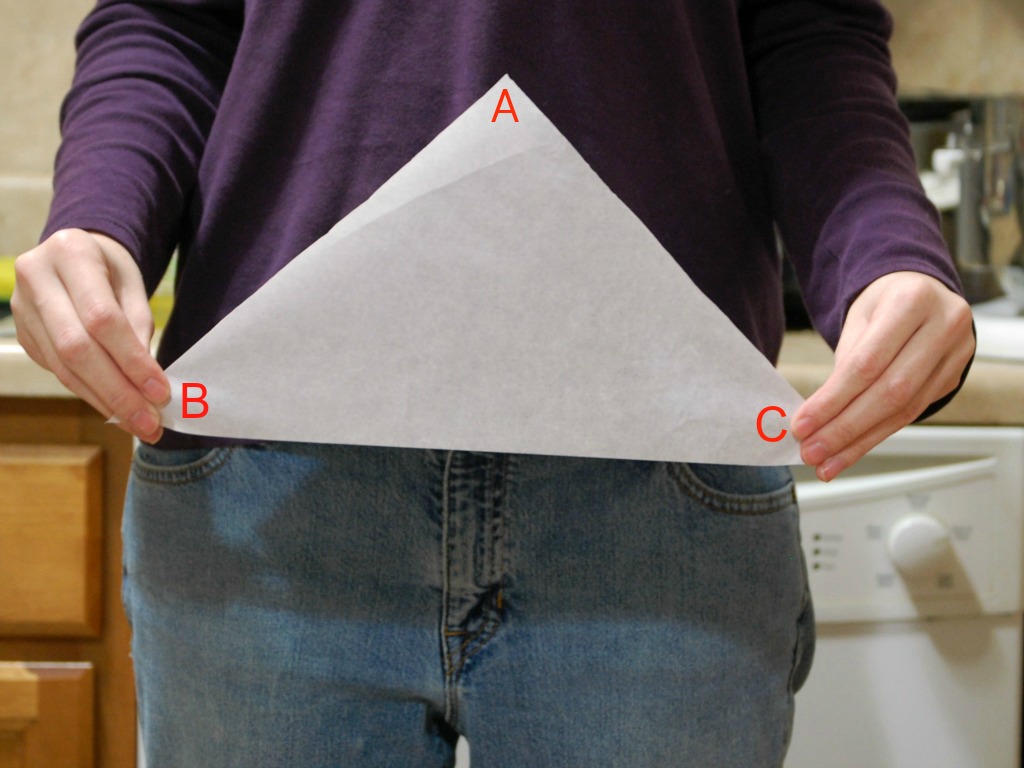
    Take Corner B and curl it up to meet Corner A. It's not a flat fold-over. You're creating a 3-D cone.

    parchment cone 2


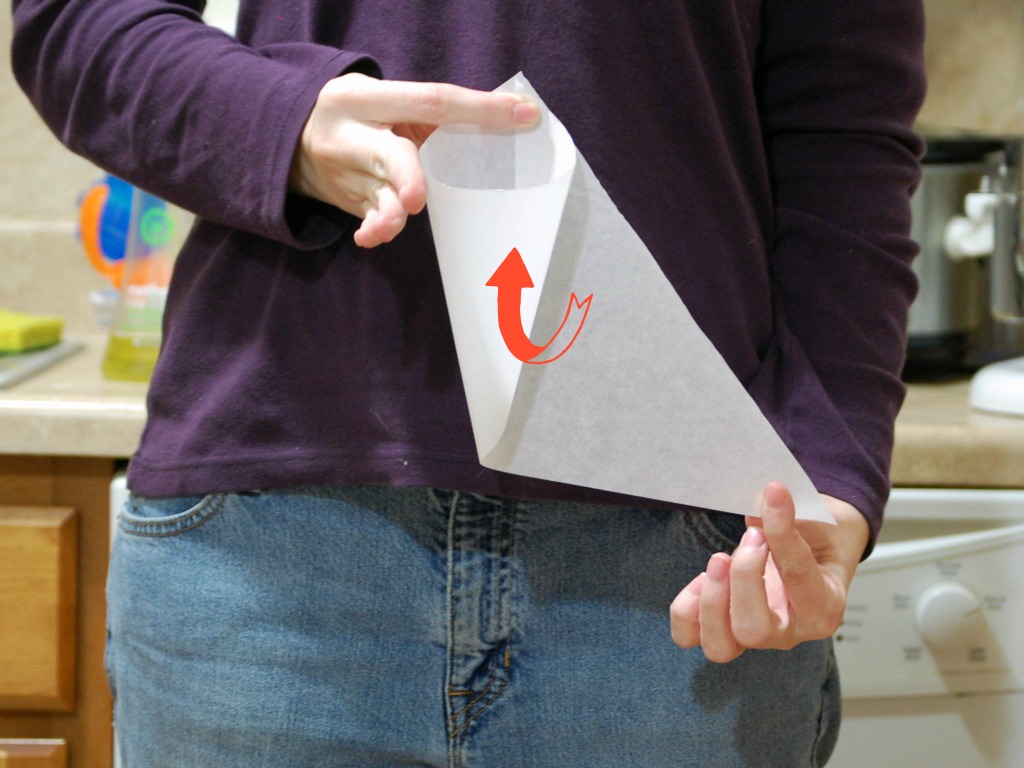
    Repeat the same motion, curling Corner C around the cone to meet behind Corner A. Pull the points taut to ensure the point of the cone is closed.

    parchment cone 3


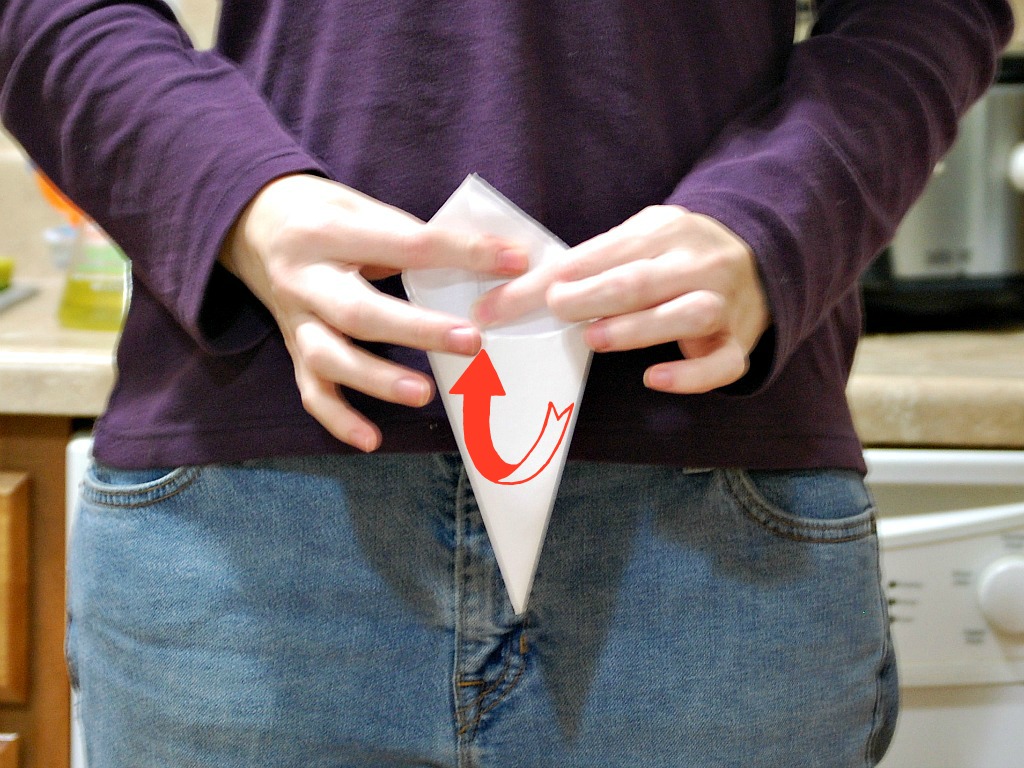
    Now, take the three points and fold them down inside the cone, to keep it folded.

    parchment cone 4


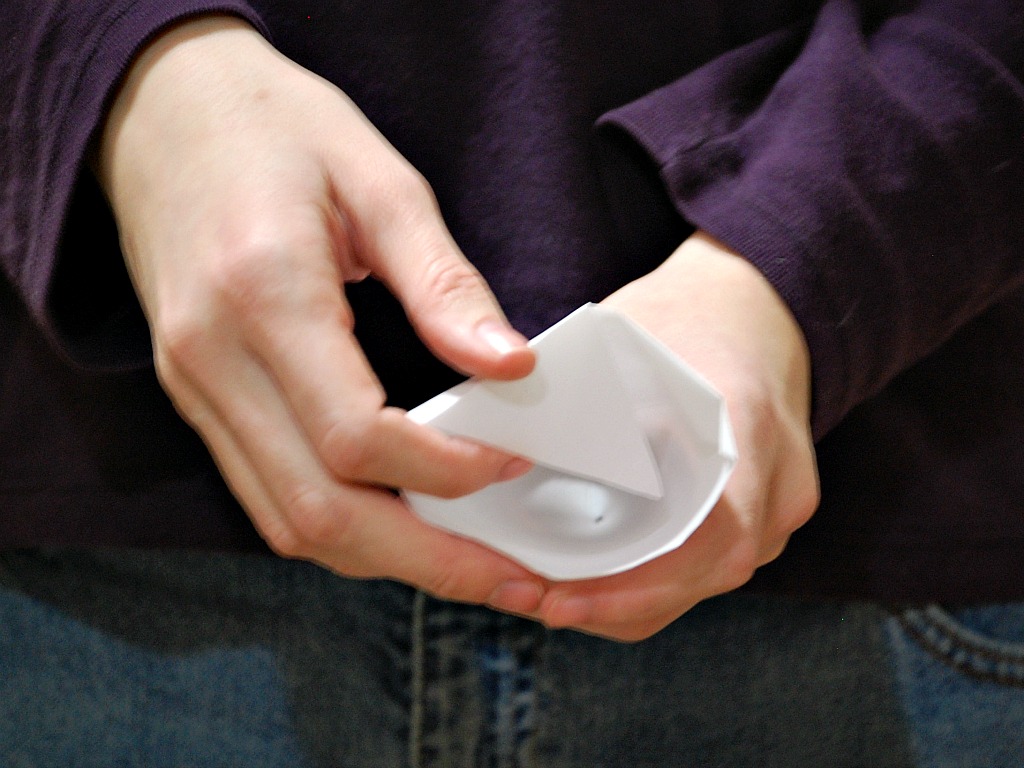
    You can now scrape the melted chocolate into the cone. I find it easiest to prop the cone up inside a tall, thin glass. That way I have both hands available, holding the bowl with one hand and scraping the chocolate out with a spoon or spatula with the other. Then fold the top over and roll it down to close the cone.

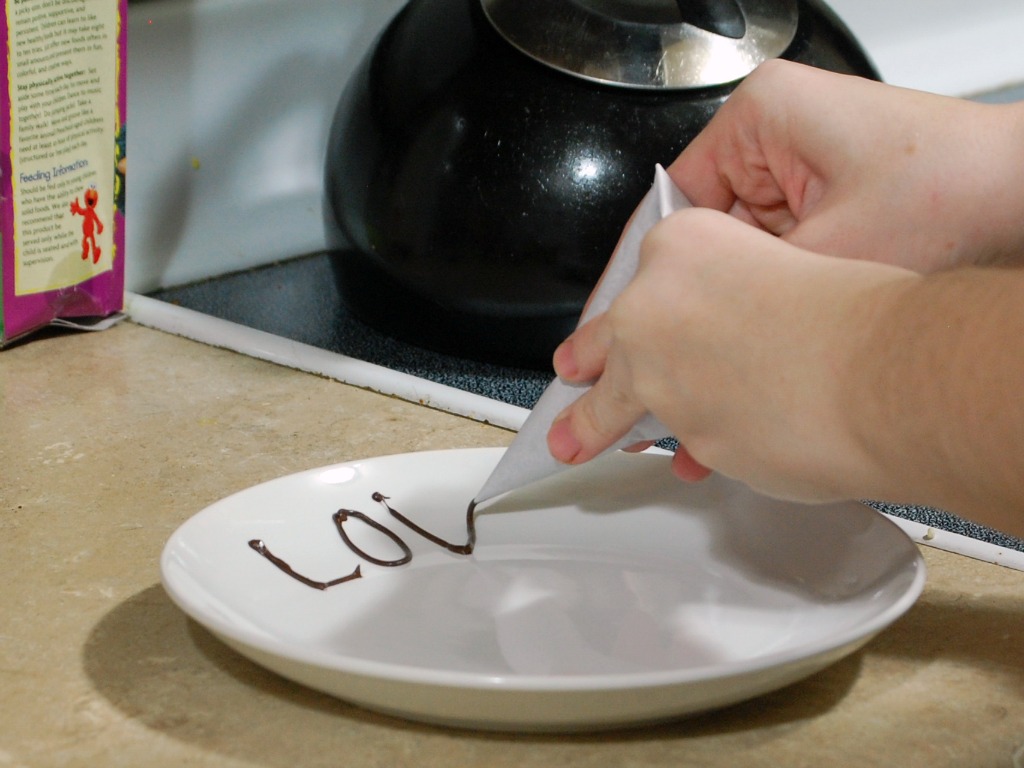
    Get your plate, and snip a TINY corner (no bigger than the tip of a blunt pencil) off of the tip of the cone. I recommend practicing with printed letters before moving on to cursive. Place the tip of the cone on the plate and gently apply pressure to squeeze the chocolate out. Lift the cone off the plate while continuing to apply gentle pressure, letting the chocolate drop in a line. Press the tip of the cone onto the plate where you want the line to end.

    writing with chocolate 1

    If your chocolate cools and starts to harden in the cone, you can microwave the entire parchment cone for a couple of seconds to warm the chocolate. Knead it to prevent hot spots, then continue writing.

    Store your finished plate in the refrigerator until you are ready to serve your dessert on it.

    Have fun!

    writing with chocolate 2

    More recipes you may enjoy

    • Halloween Haunted Fault Line Cake #HalloweenTreatsWeek
    • Swiss Meringue Buttercream and Cherry Blossom Tutorial
    • Basics of Baking Bread + Italian Bread Recipe
    • Haunted Halloween Cookie House

    Reader Interactions

    Comments

    1. Caroline {TheBarbeeHousewife} says

      February 14, 2013 at 1:11 pm

      Wow! What a great tip! Thanks!

      Reply

    Leave a Reply Cancel reply

    Your email address will not be published. Required fields are marked *

    This site uses Akismet to reduce spam. Learn how your comment data is processed.

    Primary Sidebar

    Popular Posts

    Lemoncello Tiramisu

    A short rib on the bone over mashed potatoes with gravy.

    Instant Pot Red Wine Short Ribs

    Chocolate espresso cookies are rich and fudgy. Espresso powder enriches the flavor of the chocolate and adds coffee flavor, too. #Choctoberfest

    Chocolate Espresso Cookies #Choctoberfest

    Peach butter is smoother and less sweet than peach preserves, resulting in a purer peach flavor. Canning peach butter preserves the flavor all year long. #SundaySupper

    Peach Butter

    Key lime pie parfaits — all the flavor of the pie without the work! This no-bake layered dessert is quick and easy to make. #BrunchWeek TheRedheadBaker.com

    Key Lime Pie Parfaits

    Creme Anglaise

    Irish Oatmeal Bread #StPatricksDay | theredheadbaker.com

    Irish Oatmeal Bread

    Chicken tacos are spiced with ancho chile powder and topped with cilantro slaw and avocado cream. This delicious meal is ready in under 30 minutes!

    Ancho Chicken Tacos with Cilantro Slaw and Avocado Cream

    Contact

    • Email me
    • Media Kit
    • FAQ coming soon!

    About

    • Privacy Policy
    • Copyright Policy
    • Accessability Policy

    Footer

    Newsletter

    • Sign up for newsletters and updates through email

    Footer

    About

    • Privacy Policy
    • Copyright Policy
    • Accessibility Policy

    Newsletter

    • Sign Up! for emails and updates

    Contact

    • Contact
    • Media Kit
    • FAQ coming soon!

    As an Amazon Associate I earn a small percentage from qualifying purchases.

    Protected By Pixsy

    The Redhead Baker is a registered trademark.

    Copyright © 2021 Brunch Pro on the Brunch Pro Theme

    • 359
    392 shares