It's time again for What's Baking, a monthly baking group. This month's host is Brownies and Blondies, and the theme she chose is "Convenience from Scratch" — we had to make an item that one would normally purchase that can be used in a baking recipe.

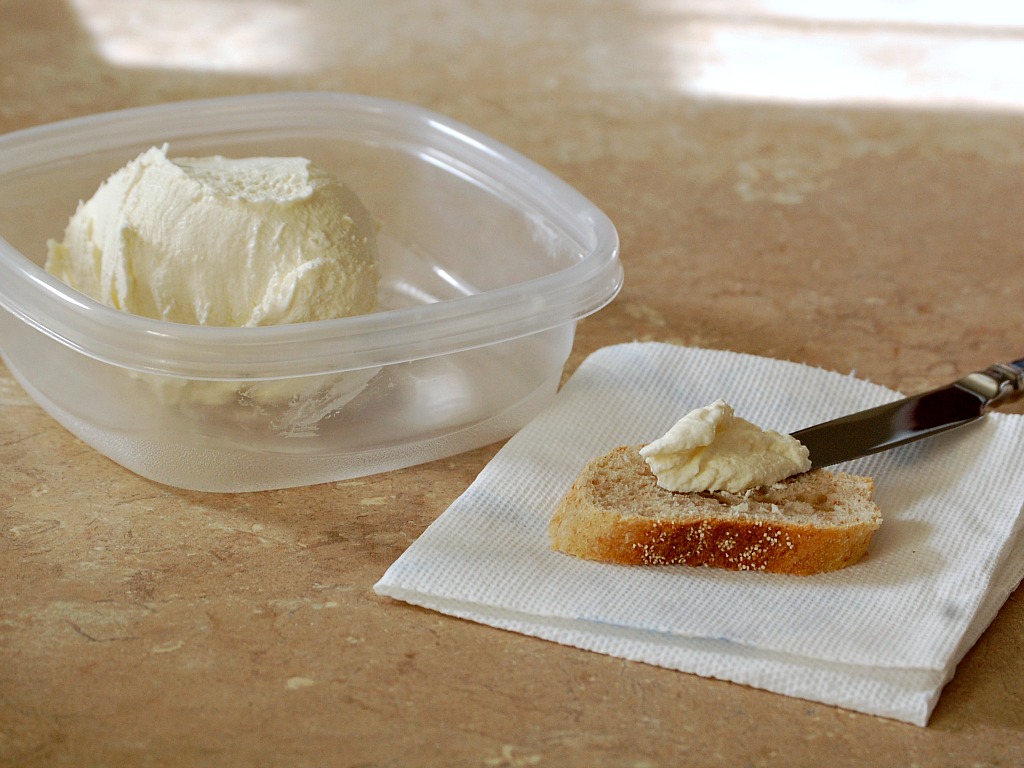
I've had a recipe pinned for quite some time that fits that description perfectly: making mascarpone cheese at home. I love mascarpone cheese. I've chosen recipes, both sweet and savory, simply because they include mascarpone.
Mascarpone is an Italian cow's milk cheese made from cream. It's a "fresh" cheese, meaning it is not aged. It has a very mild, slightly sweet flavor.
What can you do with homemade mascarpone? Probably the most obvious answer is, make tiramisu. Other sweet options include cheesecake, use it to fill profiteroles, or use it as a substitute in any recipe that calls for cream cheese. And finally, I use sweetened whipped mascarpone as a filling for cannolis, dipping the ends in mini chocolate chips and dusting with sifted powdered sugar.
Homemade mascarpone has a slightly more prominent citrus-y flavor than store-bought (which makes it even more delicious when spread on a baguette slice), but once incorporated into a recipe and baked, it won't be noticeable.
Store-bought mascarpone and a pint of heavy whipping cream cost about the same, so there's no significant savings in making mascarpone at home. But there is a great sense of accomplishment! Look, I made cheese!
Homemade Mascarpone Cheese
Recipe from Not Without Salt
Ingredients
- 2 cups pasteurized heavy whipping cream (not ultra-pasteurized, if possible)
- 1 tablespoon fresh lemon juice
Directions
- Place the heavy cream in a medium-sized heavy bottom sauce pan. Attach a candy thermometer.
- Heat the cream over medium-low heat until it reaches 190 degrees (this will take 15 to 20 minutes). Stir occasionally, increasing the frequency as the cream gets warmer.
- Once the cream reaches 190 degrees, add the lemon juice. The cream will thicken slightly. Cook the cream at 190 degrees for 5 minutes, adjusting your burner up or down as necessary to maintain that temperature.
- After five minutes, remove the saucepan from the heat, cover with a lid, and place in the refrigerator for 12 to 24 hours.
- Remove the saucepan from the refrigerator. The cream should now be the consistency of sour cream.
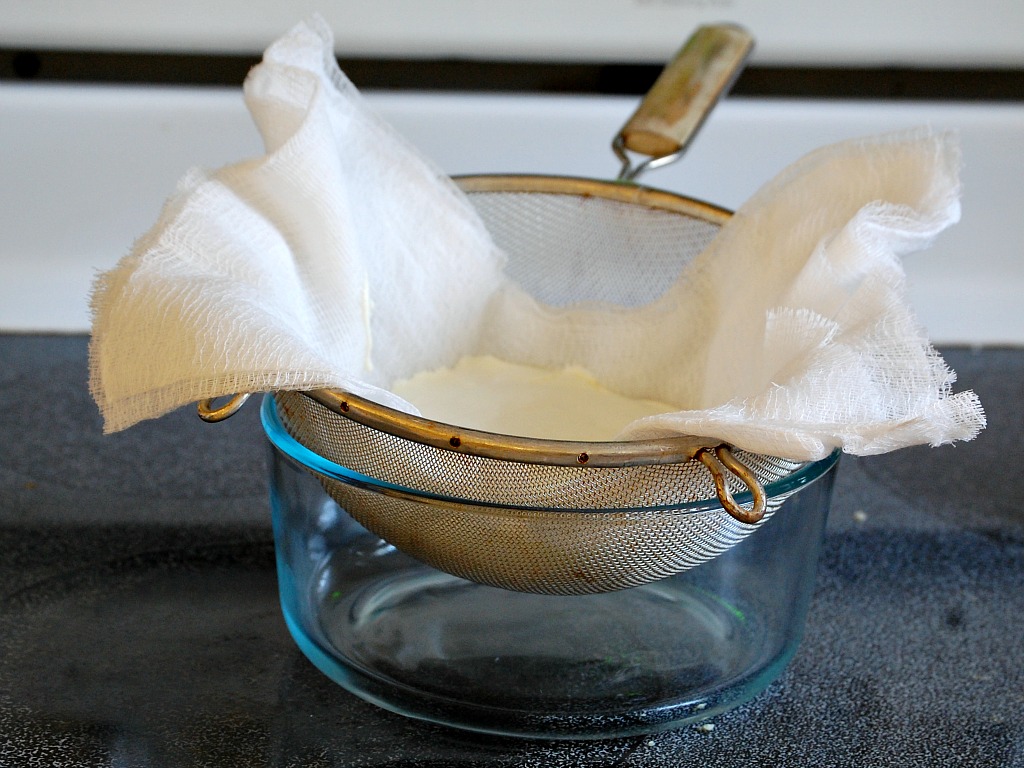
- Line a fine-mesh sieve with four layers of cheesecloth, and place over a medium bowl.
- Scrape the cream into the cheesecloth, bring the ends up over the cream and tie it into a tight bundle. Hang this bundle in the refrigerator, suspended over the medium bowl (I laid a ladle across a stockpot, set the medium bowl inside, and tied the bundle from the ladle). Leave in the refrigerator for 12 to 24 hours.
- Once that time has elapsed, there may be up to a few tablespoons of whey in the bowl, which can be discarded. Untie the bundle, and scrape your mascarpone cheese into a container with an airtight lid to store.
Preparation time: 2 days
The USA Kiwi (Kylee)
Monday 25th of February 2013
Look you made cheese!! Wow, that's neat. I love stuff like that. So what if you could buy it for the same $$ - you MADE it and get bragging rights.
Nice :)
Amy Ramos
Monday 25th of February 2013
Very cool! I love being able to make my own things instead of spending $$ on this!
Eva @ Eva Bakes
Monday 25th of February 2013
Very cool! I didn't know I could make my own mascarpone at home. Now I need to try it!