This post was created for #HalloweenTreatsWeek! I was sent products by some of the sponsor companies but as always, opinions are 100% mine.
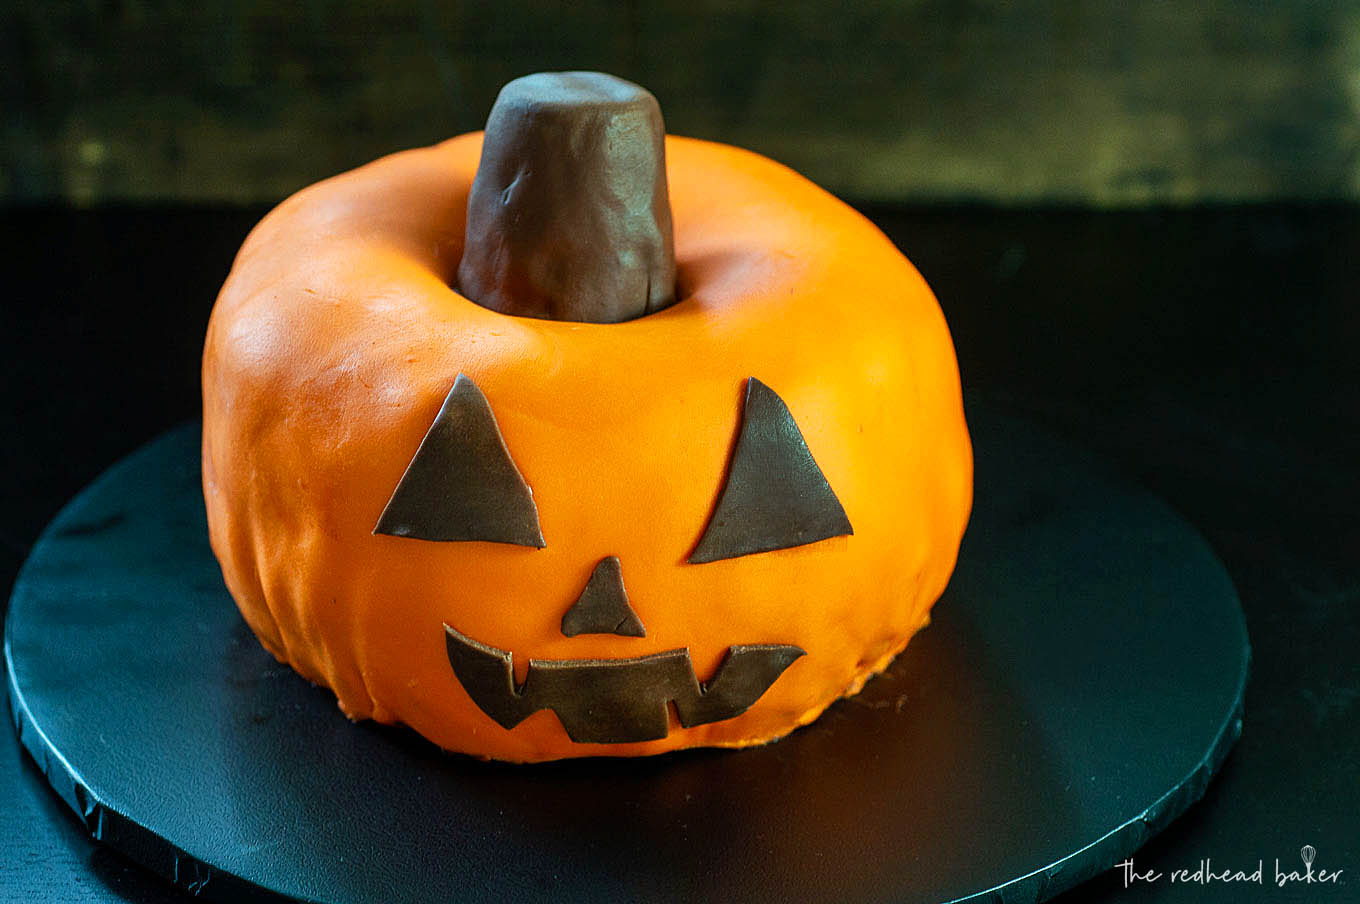
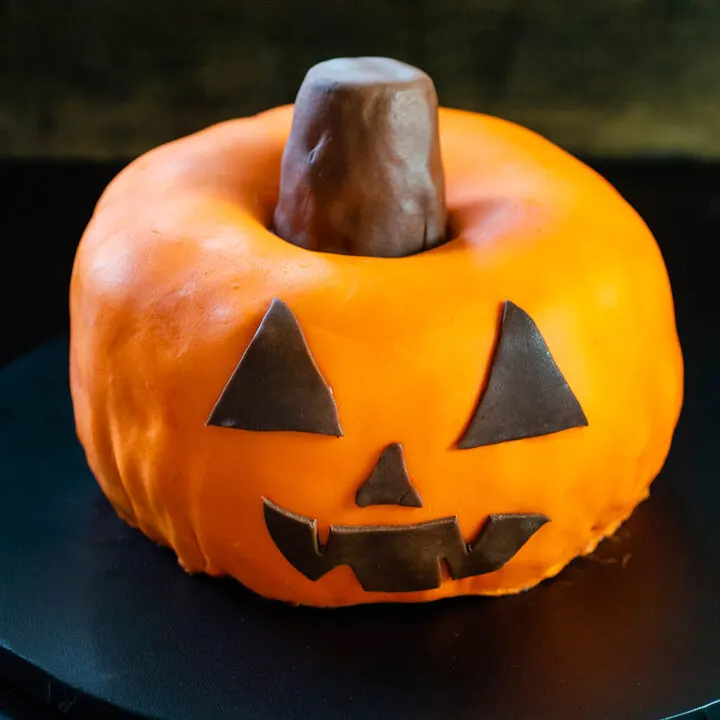
This easy chocolate jack-o-lantern bundt cake can be as cute or as spooky as you want to make it! Use this tutorial to learn how to make it.


It's October, which means Halloween is less than a month away! Planning a Halloween party? All this week, we'll have lots of Halloween Treats, so you'll get lots of ideas!
This jack-o-lantern bundt cake can be used for any kind of Halloween party (not-so-spooky kids' party or terrifying adult party) because just like with pumpkin-carving, you control how the face looks!

I've written out step-by-step instructions below, and included a video. If your gathering will be small, I recommend using two bundts baked in 6-cup bundt pans. You'll need one recipe of your favorite chocolate cake (or one box of chocolate cake mix), and divide the batter between the two bundt pans. If you only have one, bake half of the batter, unpan the cake, and then bake the second half of the batter.
If you're having a larger gathering, you can make this with two bundts baked in standard size 12-cup bundt pans. You'll need a double recipe of your favorite chocolate cake, or two boxes of chocolate cake mix. You'll also need to double the amounts of fondant listed in the tutorial below.
Whether I make my cake from scratch or not, I like to use canned frosting for this cake. It's faster, and since we want the surface of the cake to look bumpy like a real pumpkin would, it doesn't matter than canned frosting is difficult to get super-smooth.
If you're feeling really adventurous, you can also grab some green fondant, and use a leaf cutter to cut green leaves and add them where the stem meets the pumpkin, and roll thin ropes of green fondant for vines.

When it's time to cut the cake, you'll need a serrated knife to cut through the fondant. A cake made with two 6-cup bundts should serve about 8 to 10 people.
Once the cake is covered in the orange fondant, do not refrigerate the cake. This can cause the fondant to "sweat," which will cause the fondant to sag or even stretch and rip.

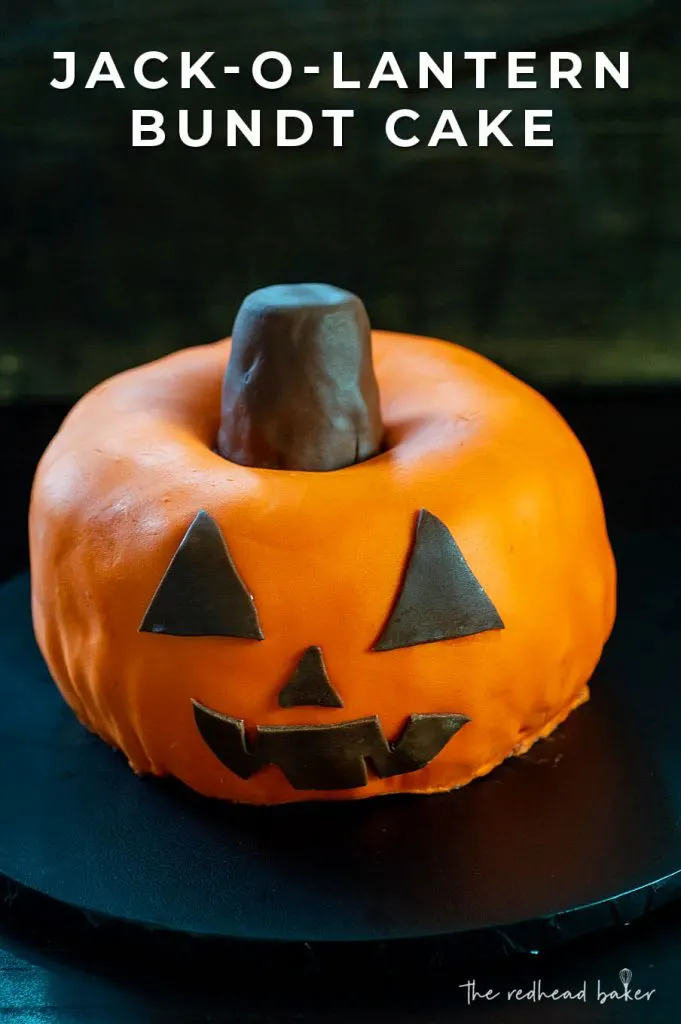
Jack-O-Lantern Bundt Cake
This easy chocolate bundt cake can be as cute or as spooky as you want to make it! Use this tutorial to learn how to make it.
Materials
- 2 chocolate bundt cakes baked in 6-cup bundt pants
- 1 can (16 oz) chocolate frosting
- 1 lb orange fondant
- 8 oz brown fondant
- 1 flat-bottomed ice cream cone
Tools
- Cake turntable
- Small offset spatula
- Rolling pin
- Vegetable shortening
- Paring knife
- Serrated bread knife
- Cake board or plate
- Silicone pastry mat (recommended but not required)
Instructions
- Place the cake board or plate on a cake turntable.
- Trim the bottom of each bundt cake to make it relatively flat.
- Place one bundt cake upside-down on the cake board. Frost with a little less than a quarter of the can of frosting. Place the other bundt cake right-side-up on top of the first one, aligning the wide and narrow bumps.
- Frosting the top and sides of the entire cake., not too thickly, because we want to preserve the shape of the bundt cake.
- Cut a small hole the center of the fondant, and gently smooth it down to conform to the inner portion of the bundt. Don't worry about ragged edges.
- Use a ruler to measure the cake from top to bottom at the highest point, and the diameter of the top of the cake (for example, my cake was 4 inches tall and 6 inches in diameter). Add those two numbers together. This will be how large a circle of fondant you need. Set the cake aside.
- Smear a layer of vegetable shortening on a clean work surface. Roll out the orange fondant to the diameter calculated above, about ⅛-inch to ¼-inch in thickness.
- Carefully transfer the fondant and lay it over the cake. Smooth it over the outer edges of the cake, conforming to the shape of the bundt cakes. Run a paring knife around the bottom of the cake and remove any excess fondant.
- Use a serrated knife to saw off the wider top part of the ice cream cone. Discard that piece, keeping only the narrower bottom of the cone.
- Roll out half of the chocolate fondant the same way that you rolled out the orange, this time making the fondant a rectangle about the same width as the length of the ice cream cone.
- Coat the ice cream cone in chocolate frosting, then cover the cone in the fondant, smoothing out any creases. Wrap the fondant under and inside the ice cream cone. Pat a small amount of water on the bottom edge and place it in the center of the bundt.
- Roll out the second half of the brown fondant. Use a paring knife to cut out eyes, a nose and a mouth for your jack-o-latern. Pat a small amount of water on the shapes, and place the damp side against the orange fondant. The water will make it stick.
Notes
If your fondant is stiff, microwave on HIGH for 10 seconds per pound (do not overheat) and knead until it softens. Keep unused fondant covered to prevent drying out.
You can use two bundts baked in a standard 12-cup bundt pan. You will need to double the amount of frosting and fondant needed for this tutorial.
Recommended Products
As an Amazon Associate and member of other affiliate programs, I earn a small percentage from qualifying purchases.


- Chocolate Candy Witch Cauldrons from Big Bear's Wife
- Candy Corn Fudge from Fake Ginger
- Candy Corn Layer Cake from Hezzi-D's Books and Cooks
- Candy Corn Cookie Bars from 4 Sons R Us
- Halloween Potato Eyes from Pastry Chef Online
- Monster Munch Chex Party Mix from I am a Honey Bee
- Gluten Free Chocolate Monster Cookies from Frugal & Fit
- Caramel Sprinkle Baked Donuts from Cookaholic Wife
- Ghostly Popcorn Balls from Our Good Life
- Hocus Pocus Spell Book Brownies from Cheese Curd In Paradise
- Mummy Cake Pops from Jen Around the World
- Zombie Chocolate Donuts from Kelly Lynn’s Sweets and Treats
- Black Cauldron Bubbly Cupcakes from Daily Dish Recipes
- Boolicious Caramel Chocolate Covered Fruit from Everyday Eileen
- Jack-o-Lantern Candy Bark from Sweet Beginnings
- Caramel Apple Blossoms from For the Love of Food
- Monster Marshmallows from Shockingly Delicious
- Halloween Muddy Buddies from Back To My Southern Roots
- Mummy Crinkle Cookies from Creative Southern Home
- Sally's Sugar Cookies from The Spiffy Cookie
- Eyeball Thumbprint Cookies from A Kitchen Hoor's Adventures
- Eye of Newt Halloween Wands from Who Needs A Cape?
- Halloween Brownie Pudding Parfait from Desserts Required
- Halloween No Bake Cheesecake from Lemon Blossoms
- Halloween Dipped Ice Cream Cones from West Via Midwest
- Pumpkin Soup with Savory Spices and Roasted Pumpkin Seeds from Nancie's Table
- Halloween Stuffed Chocolate Whoopie Pies from Karen's Kitchen Stories
- Death by Chocolate Dessert Ball from Strawberry Blondie Kitchen
- Jack o Lantern Bundt Cake from The Redhead Baker
- Frankenstein Cupcake Cake from Jonesin' For Taste
- Chocolate Truffle Pumpkin Spider Cake from Sweet ReciPEAs
- Spooky Sprinkled Brownies from The Beard and The Baker
- Halloween Candy Charcuterie Board from Pint Sized Baker
- Halloween Monster Buttermilk Pancakes from Katie’s Cucina
- Sugar Skull Layer Cake from Love and Confections
- Mummy Meringue Pops from My Sweet Zepol
- Halloween Hidden Bat Loaf Cat from Savory Moments
- Vegan Halloween Cookies & Cream Fault Line Cake from The Baking Fairy
- Halloween Corn Chip Dessert Bars from Intelligent Domestications
- Oogie Boogie Meringue Cupcakes from A Blender Mom
- Smores Ghost Brownies from Books n' Cooks
Karen D
Wednesday 9th of October 2019
My favorite Halloween 'character' is the Great Pumpkin from Charlie Brown / Peanuts