When I say "comfort food," what do you picture? A dish of creamy oven-baked macaroni and cheese? A big bowl of hearty stew? A grilled cheese sandwich with a piping hot bowl of creamy tomato soup?
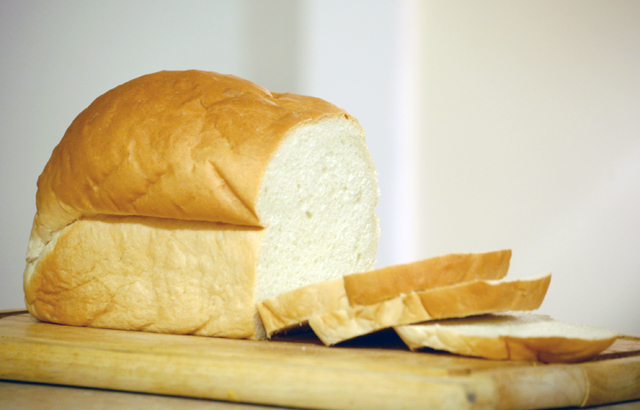
I think of toast. Toasted white sandwich bread, lightly smeared with butter and some variety of berry preserves. Before I "woke up" and realized the lack of nutrition in white bread, you could catch me downing six (yes, six!) slices of toasted white bread with butter and strawberry jelly in a sitting.
My mother finally asked me if I realized how many calories I was consuming, and I realized how bad white bread is, but I will still occasionally bake a loaf as a treat for myself, and have a slice or two of toast with butter and blackberry preserves. Sliced thick, this bread also makes wonderful French toast. If there is any left to get stale, turn it into croutons, breadcrumbs or bread pudding. Because this bread has no preservatives, it will go bad more quickly than store-bought bread, so store it in a plastic grocery-store produce bag with a twist-tie, and keep it in the refrigerator. Freeze the second loaf, wrapped in two layers of plastic wrap.
Use an instant-read meat thermometer to measure the temperature of the water and the milk. If your liquid is too hot, you'll kill the yeast. If it is too cold, the yeast won't activate. In either case, your bread won't rise.
Basic White Sandwich Bread
Source: Food.com
Yield: 2 (9x5-inch) loaves
Ingredients
- ¼ cup warm water (100 to 115 degrees F)
- 2 cups warm milk (100 to 115 degrees F)
- 4 teaspoons active dry yeast
- 1 pinch sugar
- 2 tablespoons honey
- 2 tablespoons unsalted butter, melted
- 1 tablespoon kosher salt
- 6 to 6 ¼ cups bread flour, plus extra
- Canola oil, for greasing
Directions
- Combine the water and a ¼-cup of the milk. Sprinkle the yeast and a pinch of sugar over the liquid. Gently stir and let sit for 10 minutes. This is called "proofing" the yeast.
- In a large mixing bowl, combine the rest of the milk with the honey, melted butter, salt and 2 cups of the flour. The mixture should be thick and creamy.
- Add the yeast mixture and 1 cup of flour to the dough. Beat just until combined.
- Beat in a little of the remaining ½-cup of flour at a time — depending on the humidity in your area that day, you may not need all of it. You are looking for dough that pulls away from the sides of the bowl, and is smooth and elastic.
- Brush a large mixing bowl with oil and place the dough in the bowl. Turn the dough to coat it with the oil.
- Cover the bowl loosely in a kitchen towel, and let sit in a dark, draft-free place until double in volume, which should take about 1 ½ hours.
- Lightly grease two 9x5 loaf pan with nonstick cooking spray. Preheat oven to 375 degrees.
- Place the dough on a lightly floured work surface, and divide in half. Gently pat each half into a rectangle.
- Fold each rectangle like a letter, folding one third from each end in toward the middle, slightly overlapping the short ends in the middle. Press down to flatten and seal the edges. Repeat with other half of dough.
- Beginning in the middle and working out toward the ends, roll the dough into a tube the same length as the loaf pan. Repeat with second loaf of dough.
- Pinch the ends and along the seam to seal each loaf, and place each in its own baking pan, seam-side down.
- Cover loosely with kitchen towel, and let rise until the dough expands one inch above the baking pan, which should take about another hour.
- Bake in the oven to 40 minutes, or until the edges are golden and pull away from the sides of the baking pan.
- Remove the bread from pans and place on cooling racks to cool completely.
justbakedbyme
Wednesday 25th of July 2012
This looks like the perfect loaf of white bread. I'm working on my fear of yeast and this would be a great recipe to tackle next.
DNCWWO
Wednesday 25th of July 2012
I found that using a thermometer to temp the warm liquid really helped my intimidation about yeast. I haven't had a bread failure since I started using one!