In this Christmas Wreath Cupcake tutorial, I show you how to turn your favorite cupcake into a festive Christmas wreath with some red and green icing and a few simple tools.


Welcome to Day 6 of Christmas Week. This annual event was started in 2012, and is hosted by Kim of Cravings of a Lunatic. This year we have over 35 bloggers sharing festive sweet recipes for the event. Plus we all chipped in for a huge Amazon Gift Card Giveaway so be sure to enter!


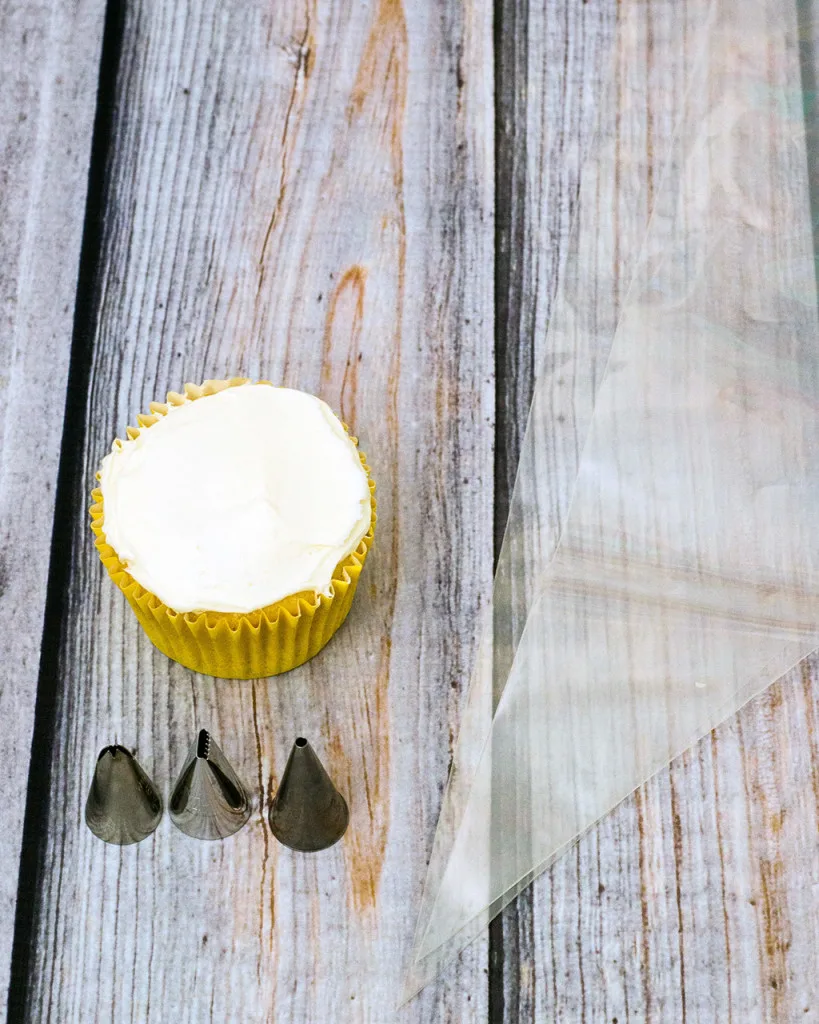
These cupcakes start with two dozen of your favorite cupcake recipe. Chocolate, vanilla -- whatever flavor you want! Once cooled, give them a flat layer of icing with your favorite frosting. I like using vanilla, because the red and green of the wreath pop against the white frosting. I'm not crazy about the flavor of decorating buttercream (it's the shortening), and my favorite flavors of frosting aren't always a great consistency for decorating, so I will usually ice in with one kind of icing, and decorate with the one below.
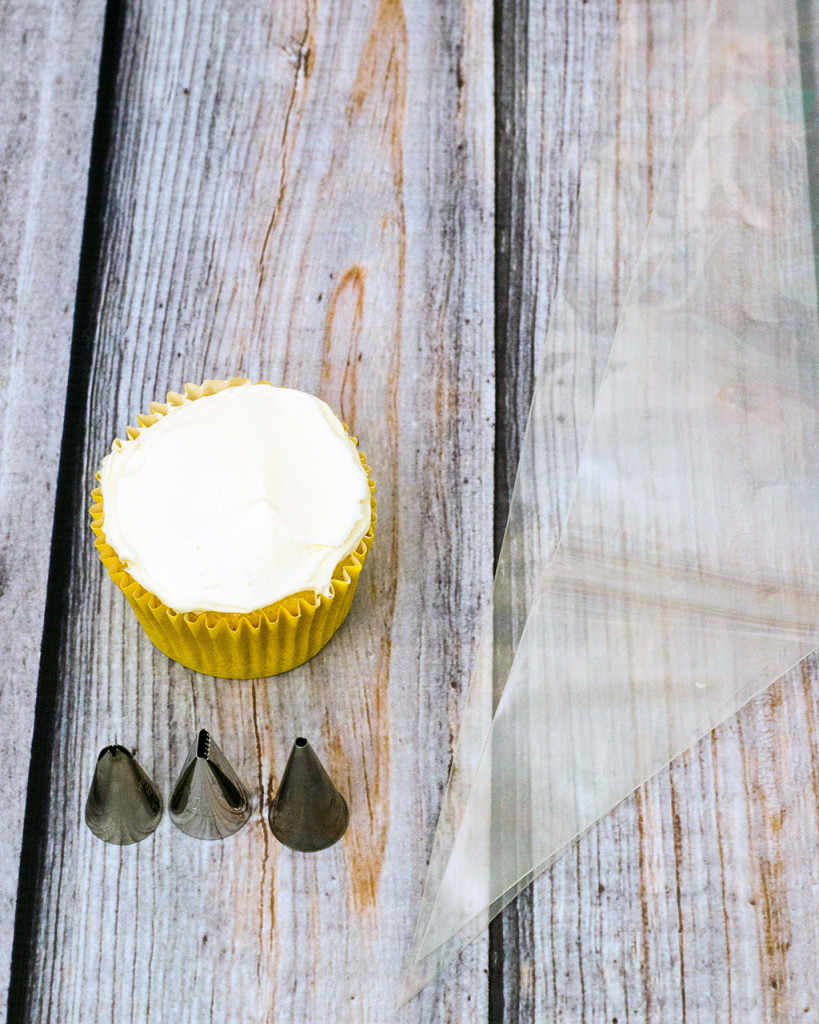
Then you will need:
- One batch of the decorator icing written below
- Red and green food coloring (I recommend AmeriColor
)
- Three disposable decorating bags
- Three decorating tips: leaf tip #68
, petal tip #102
, and round tip #4
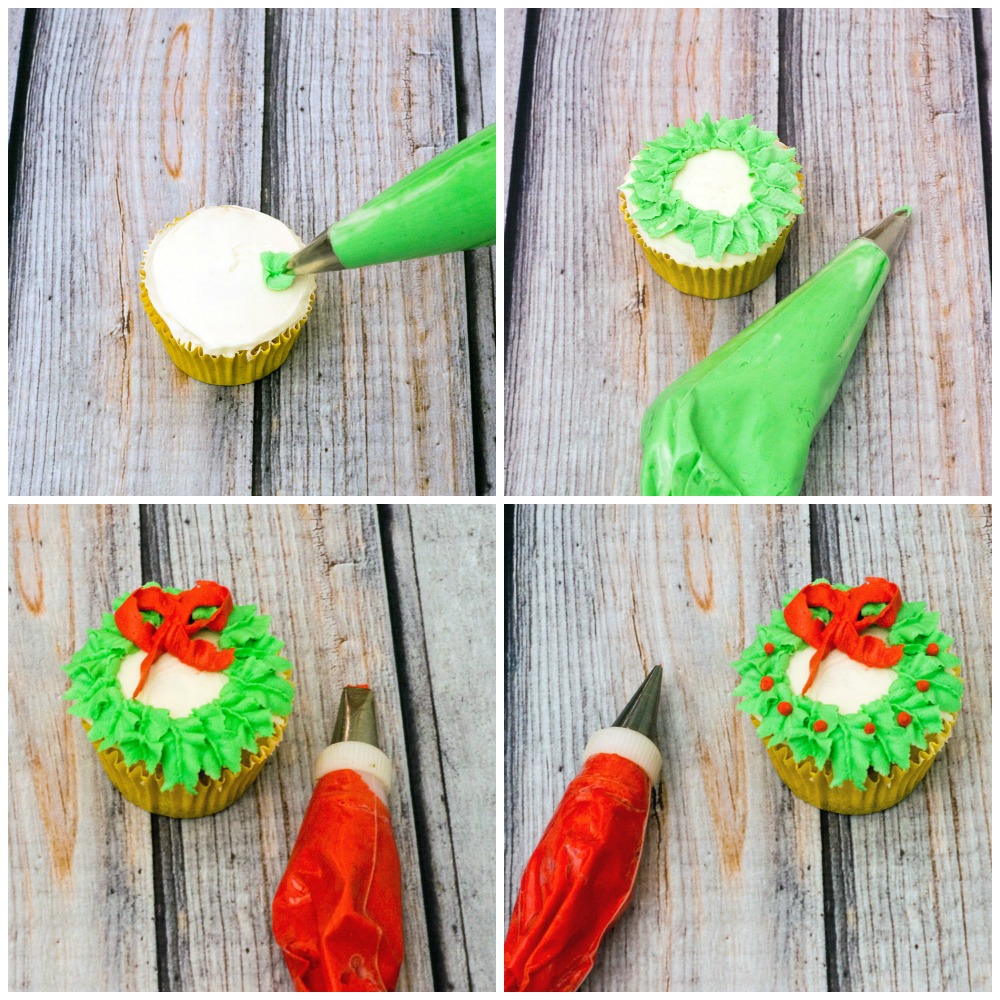

Take one third of the decorator icing and move it to a separate bowl; tint with red. Tint the remaining ⅔ of decorator icing with green food coloring.
Place the leaf tip inside one of the decorating bags, and snip off the tip of the bag just below the bottom of the tip opening. Fill the bag halfway with green icing. Twist the end of the bag so that the icing doesn't squeeze out the back. Hold the bag so that the tip opening is parallel with the cupcake surface. Place the tip on the surface of the iced cupcake, about half an inch from the edge. Squeeze some icing out and drag the tip toward the outer edge of the cupcake, releasing pressure on the decorating bag as you drag, so the green icing forms a point. Turn the cupcake slightly and repeat right next to the first leaf, going all the way around the cupcake. Repeat with remaining cupcakes.
Place the petal tip inside another decorating bag, and snip off the tip of the bag as before. Fill the bag with about a quarter cup of red icing. Hold the tip so that the fat end of the tip opening is just touching the fat end of the wreath leaves. Gently squeezing, begin to make the bow: move the tip in a figure 8 shape, moving up and to the left first, back to the middle, then down and to the right and back to the middle. Make two hanging ribbon ends if you want. Repeat with remaining cupcakes.
Place the round tip inside another decorating bag, and snip off the tip of the bag as before. Fill with a few tablespoons of red icing. Hold the tip at a 90 degree angle to the surface of the cupcake, and gently and quickly apply enough pressure to squeeze out a dot of icing, then release pressure. Repeat all over the leaves to form little ornament balls. Repeat with remaining cupcakes.
You're done! If you try this cupcake tutorial at home, I'd love to see! Post photos on Instagram and use the hashtag #TheRedheadBaker


Christmas Wreath Cupcake Tutorial + an Amazon Gift Card Giveaway
Ingredients
- ½ cup solid vegetable shortening, 3 ¼ oz
- ½ cup unsalted butter, softened, 1 stick
- 1 teaspoon vanilla extract
- 4 cups confectioners sugar, sifted, 16 oz
- 2 tablespoon milk
Instructions
- Cream together the shortening and the butter on medium high speed until well-blended. Beat in the vanilla extract.
- Add the sugar, one cup at a time, beating on medium speed until fully incorporated and the mixture looks dry.
- Gradually add the milk, beating until the frosting is very light in color and fluffy.
- Cover with a damp paper towel when not using, as buttercream will crust over if it sits exposed to the air.
Recipe by Wilton
Recipes from Day 6 of Christmas Week! Please visit all our talented participants:
- Holiday Fudge from Cravings of a Lunatic
- Christmas Wreath Cupcakes from The Redhead Baker
- Gingerbread Sugared Almonds from Crumb: A Food Blog
- Fresh Cranberry Mini Scones from Farm Fresh Feasts
- Praline Pretzels from Food Lust People Love
- Peppermint Mocha Hot Chocolate from Rants From My Crazy Kitchen
- Gingerbread Cookie Bars from From Gate to Plate
- Stained Glass Cookies from Karen's Kitchen Stories


Easy Chocolate Dessert Recipes Everyday Southwest – Recipes for Today's Families
Friday 8th of January 2016
[…] Christmas Wreath Cupcakes from The Redhead Baker […]
Laura @MotherWouldKnow
Friday 25th of December 2015
I never manage to get decorative frosting to look great - but with your tutorial, I might find success. Love your directions because they are clear and the photos make it all looks so simple.
Kim Beaulieu
Thursday 24th of December 2015
Cutest cupcakes ever. I could eat these all day long. Thanks so much for joining us for Christmas Week.
Sandra
Thursday 24th of December 2015
These ar so dang cute!! Thank you for adding the step by step instructions for us, it is really helpful to follow!
Angela | Mind Over Batter
Wednesday 23rd of December 2015
Your wreath cupcakes are adorable. Your step-by-step tutorial is truly fantastic! LOVE!!