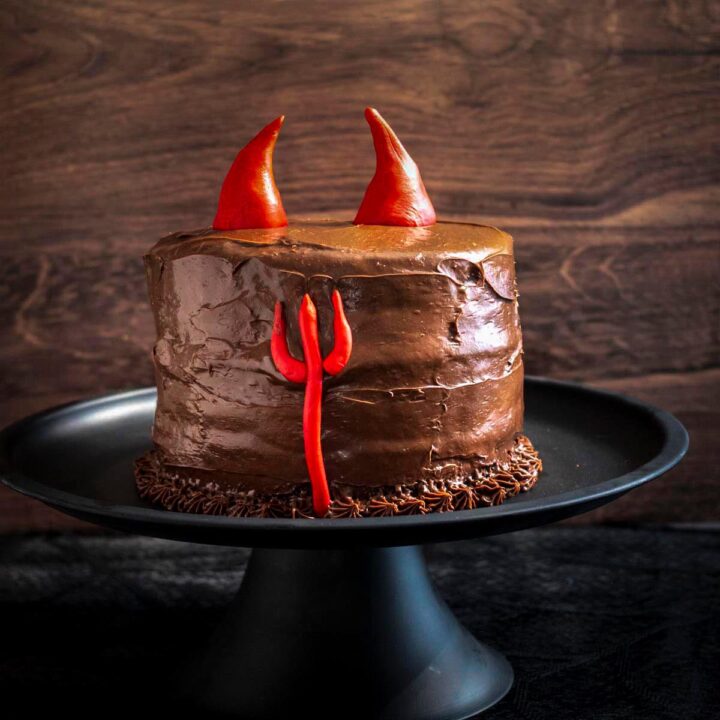
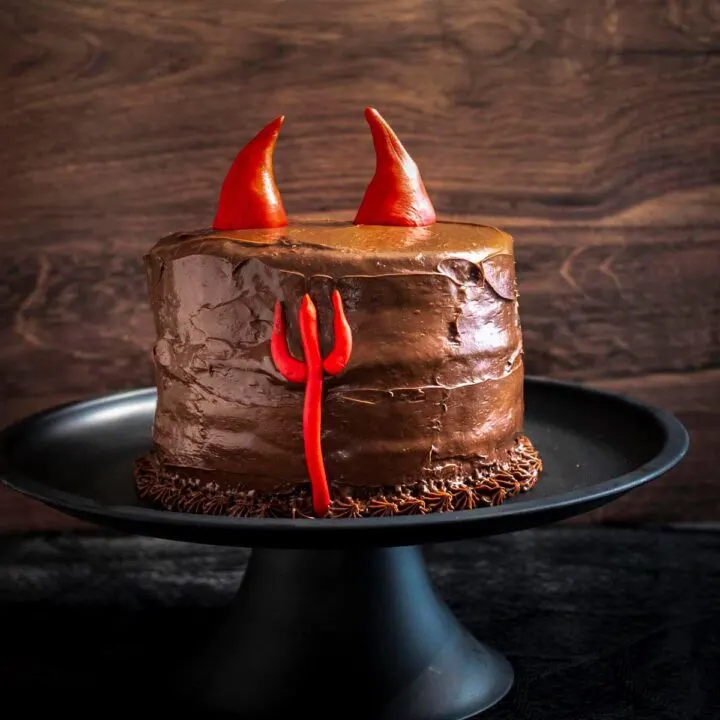
Some simple fondant decorations can turn a decadent Devil's Food Cake into a festive Halloween party centerpiece!
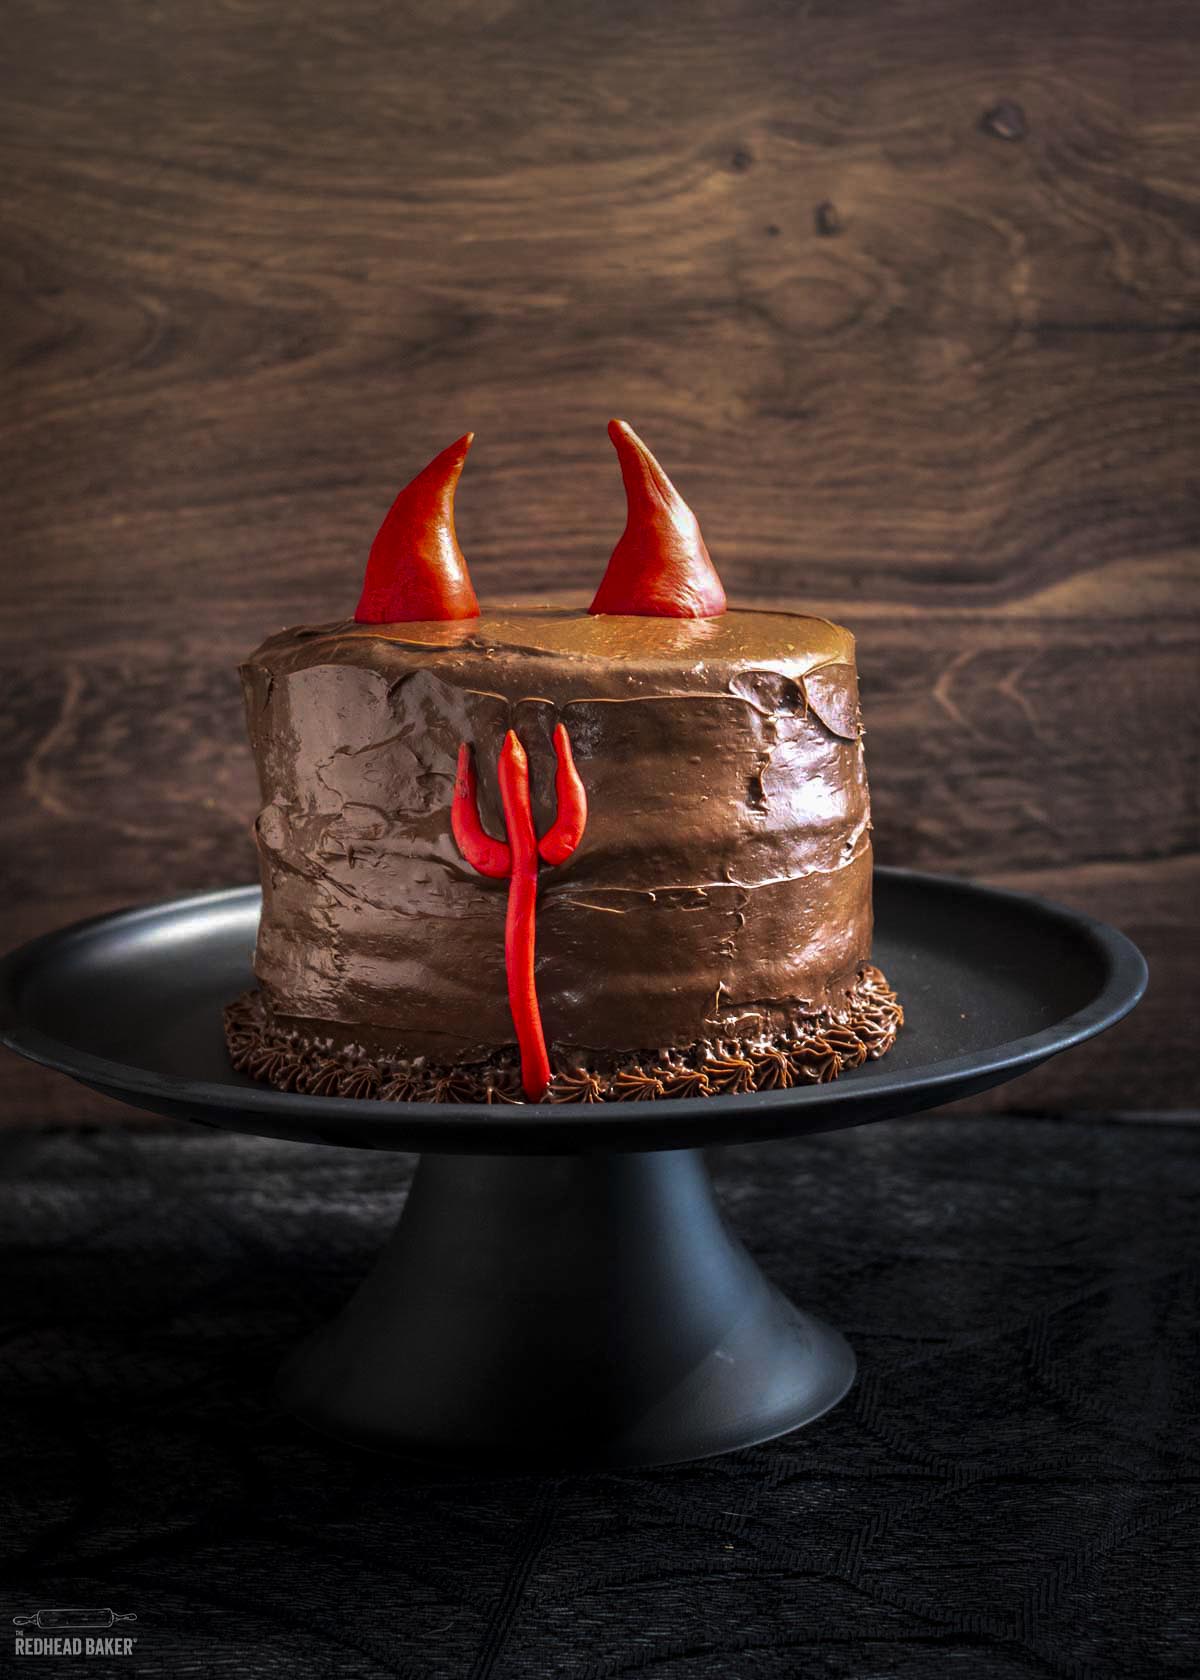
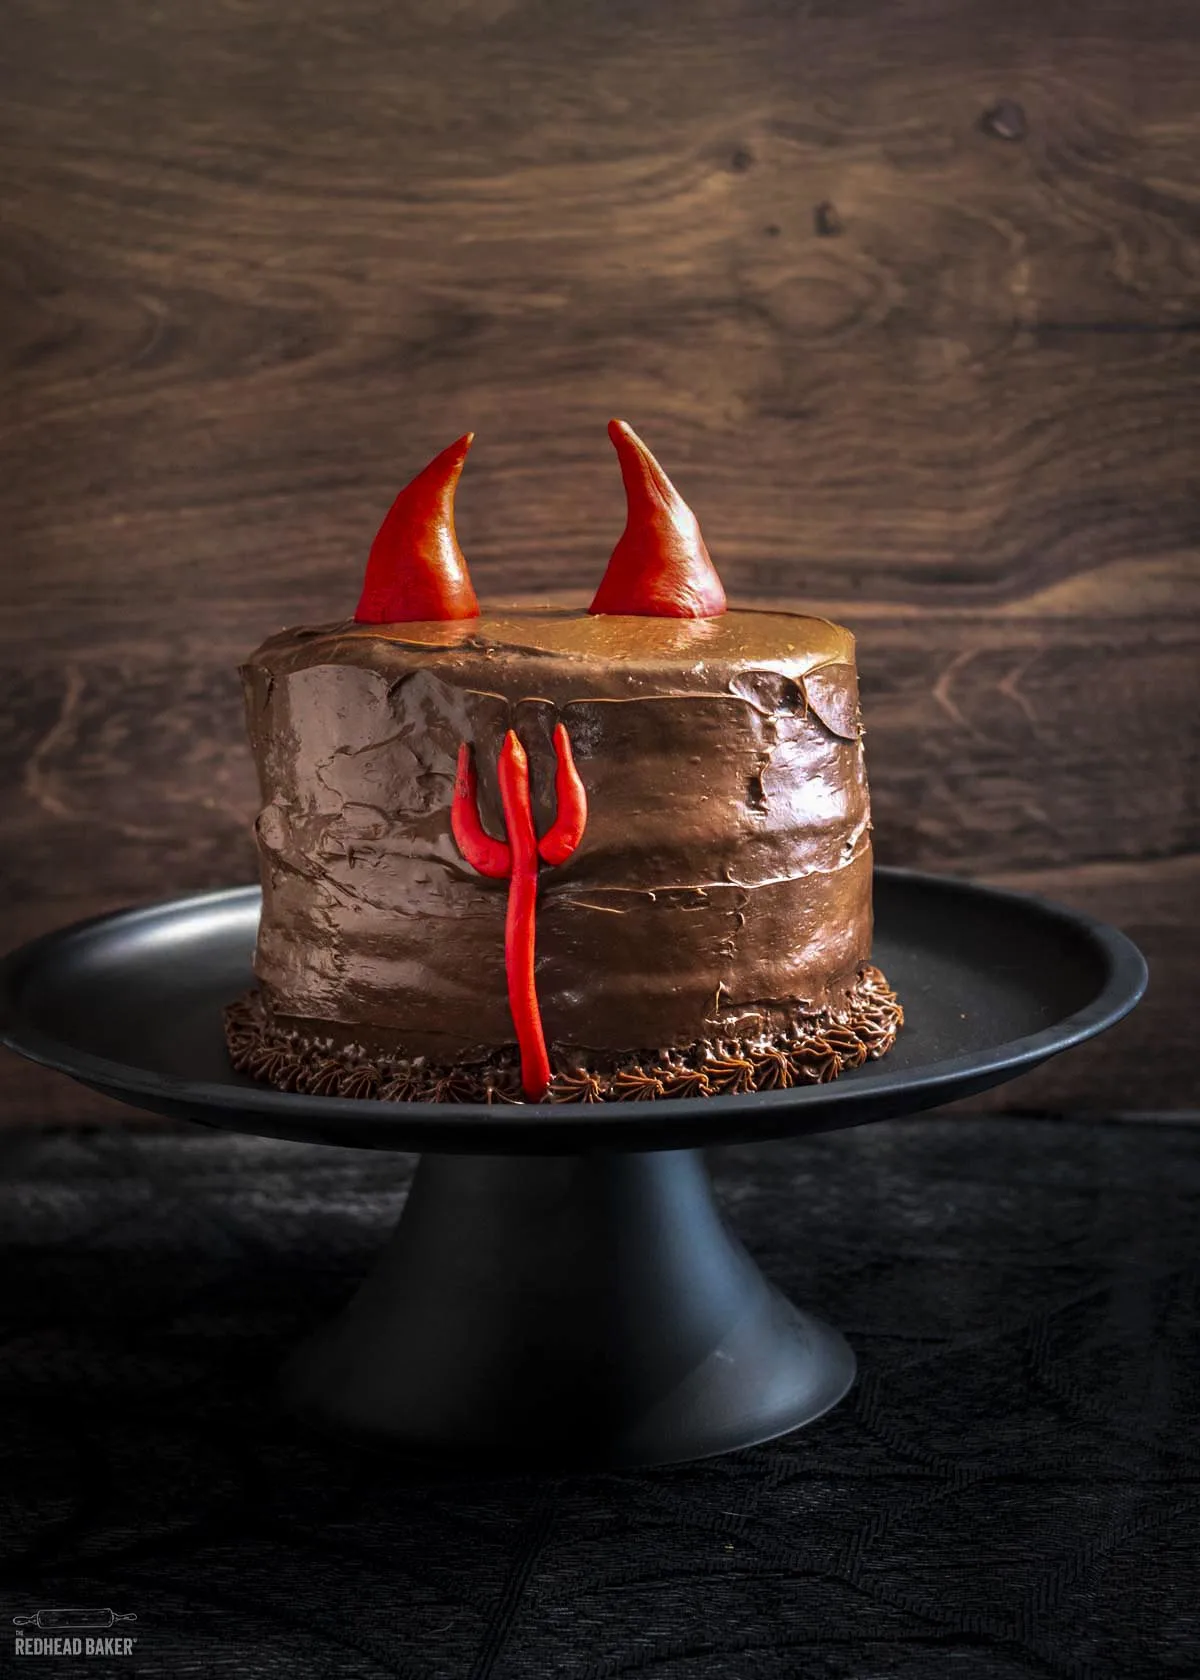
If you're looking for a centerpiece cake for your Halloween party that's spooky yet easy, look no further! Add a few easy fondant decorations to a devil's food cake, and you've got it.
Use your favorite devil's food cake recipe or boxed mix, any chocolate frosting, and either store-bought or homemade fondant dyed red.
Jump to:
Devil's Food Cake vs Chocolate Cake
What makes Devil's Food Cake have a different name from regular chocolate cake? Regular chocolate cake is usually made with melted chocolate, while Devil's food cake has a richer chocolatey flavor because it uses cocoa powder. It also has a fluffier texture because of a higher amount of baking soda.

When making this cake from scratch, I use King Arthur Baking's devil's food cake recipe, but you can used a boxed mix if that's easier for you.
In order to make the red decorations pop, I used a fudgy chocolate frosting. You could also use whipped ganache, an American or Swiss-style buttercream flavored with dark chocolate, or even store-bought chocolate frosting.
Leveling a Cake
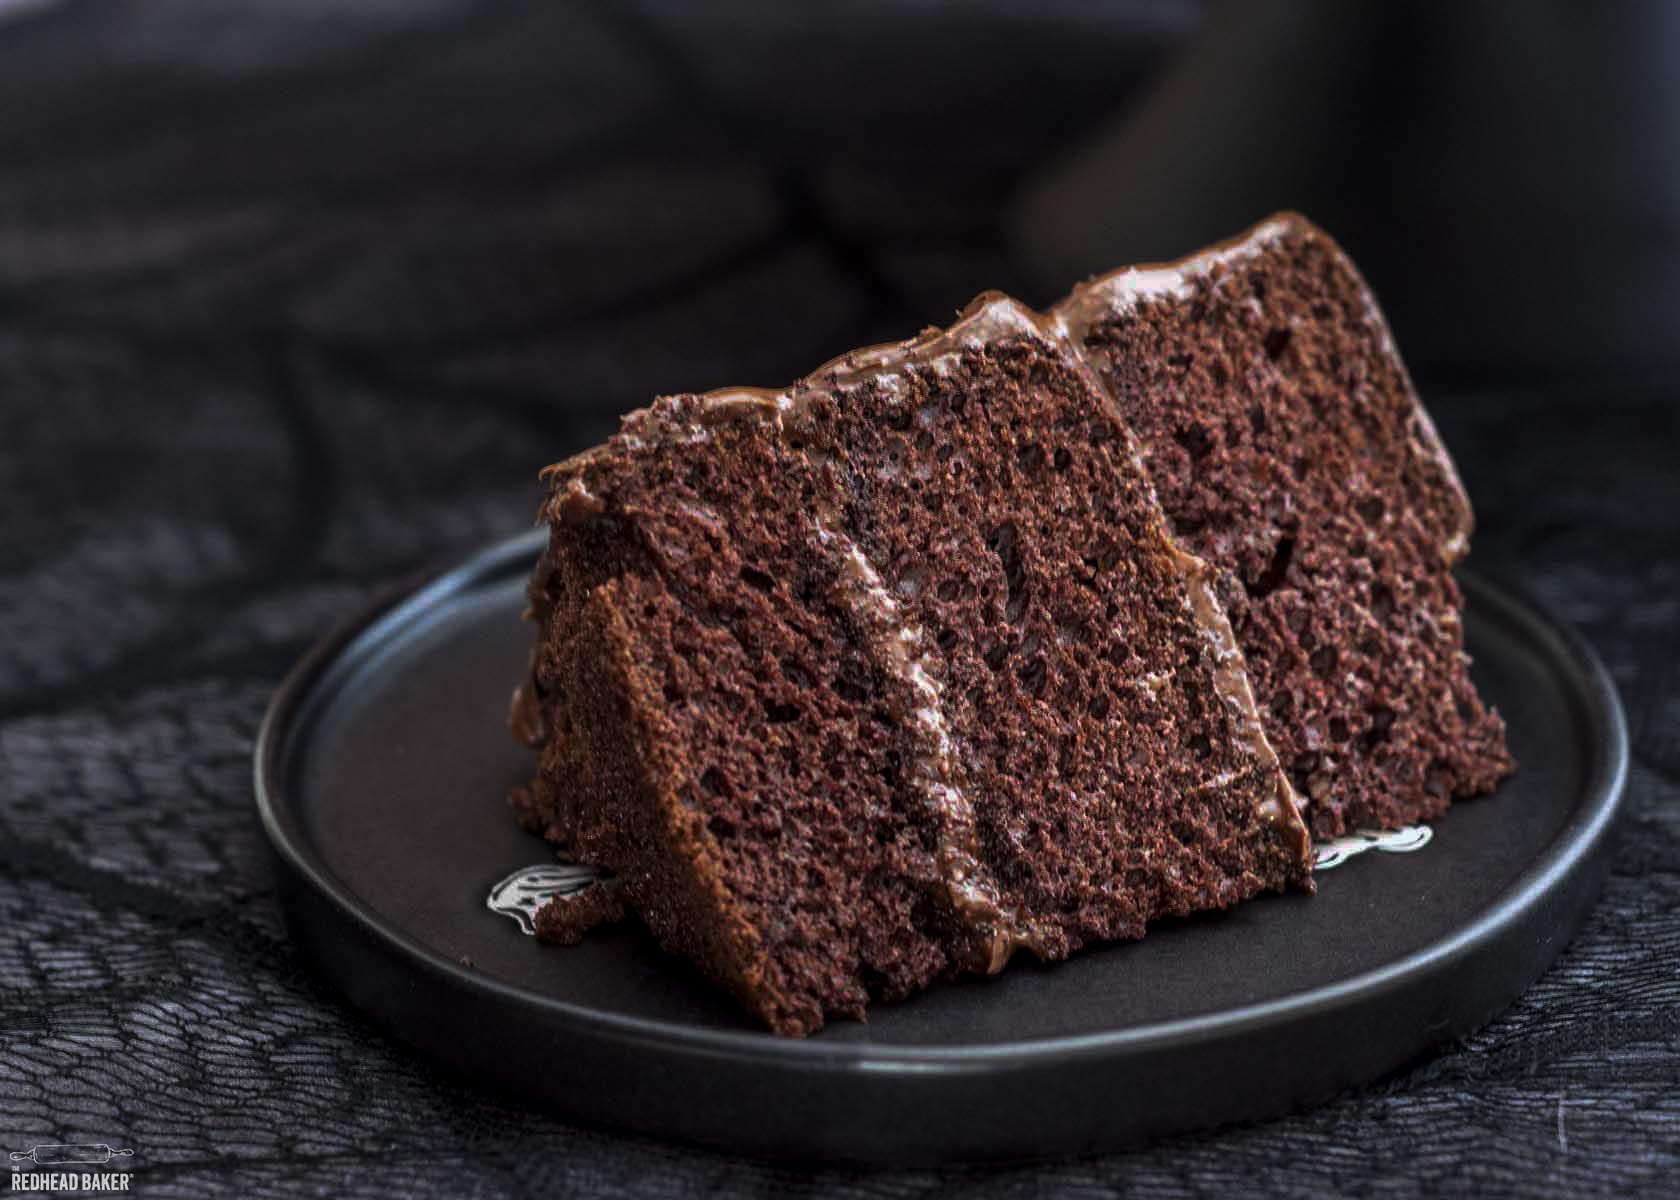
I made my cake with three 6-inch round layers, for added height. You can make the same cake with two 8- or 9-inch round layers.
First, level your cakes. When you bake a cake, it typically "domes" in the middle. Leveling your cakes enables them to sit flat on top of each other and you don't end up with a slanted cake. There are cake-leveling tools that span the width of the cake and cut it with a thin wire, but I've tried them and don't like them.

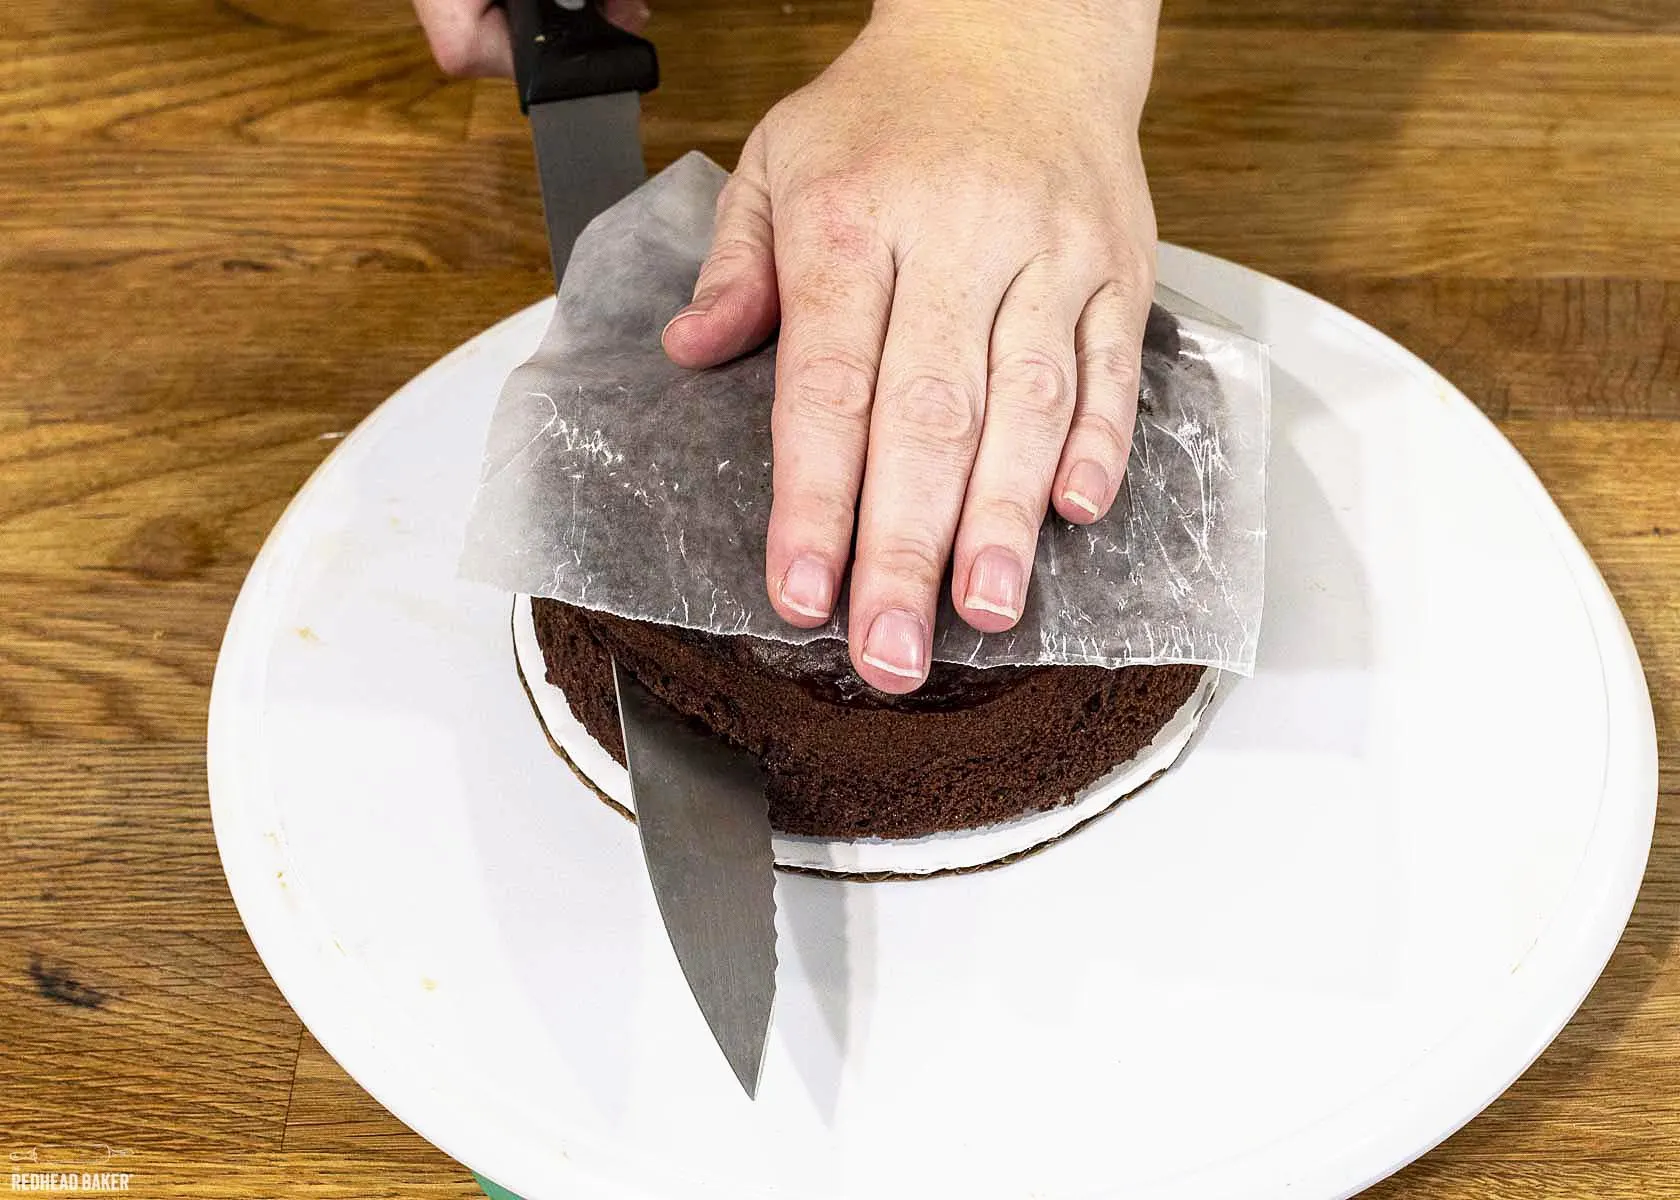
With a soft cake like devil's food, I prefer to freeze the cakes about 30 minutes before leveling them. Partially frozen cake is easier to trim.
- Place your cake on a turntable.
- Place a piece of wax or parchment paper on top of your cake (optional, this prevents cake from sticking to your hand).
- If you prefer, you can place toothpicks at intervals around your cake so you ensure you level your cake evenly.
- Hold a serrated knife in one hand, parallel to your work surface.
- Place your other hand on the top of the cake. Use that hand to turn the cake as you making a sawing motion with the knife. Turning the cake rather than the knife helps keep the knife level.
- Once the dome is off your cake, you can discard the top, save it for another use (I freeze it completely, then pulse it in a mini food processor to make cake crumbs that I can use to coat the sides of cakes), or just snack on it.
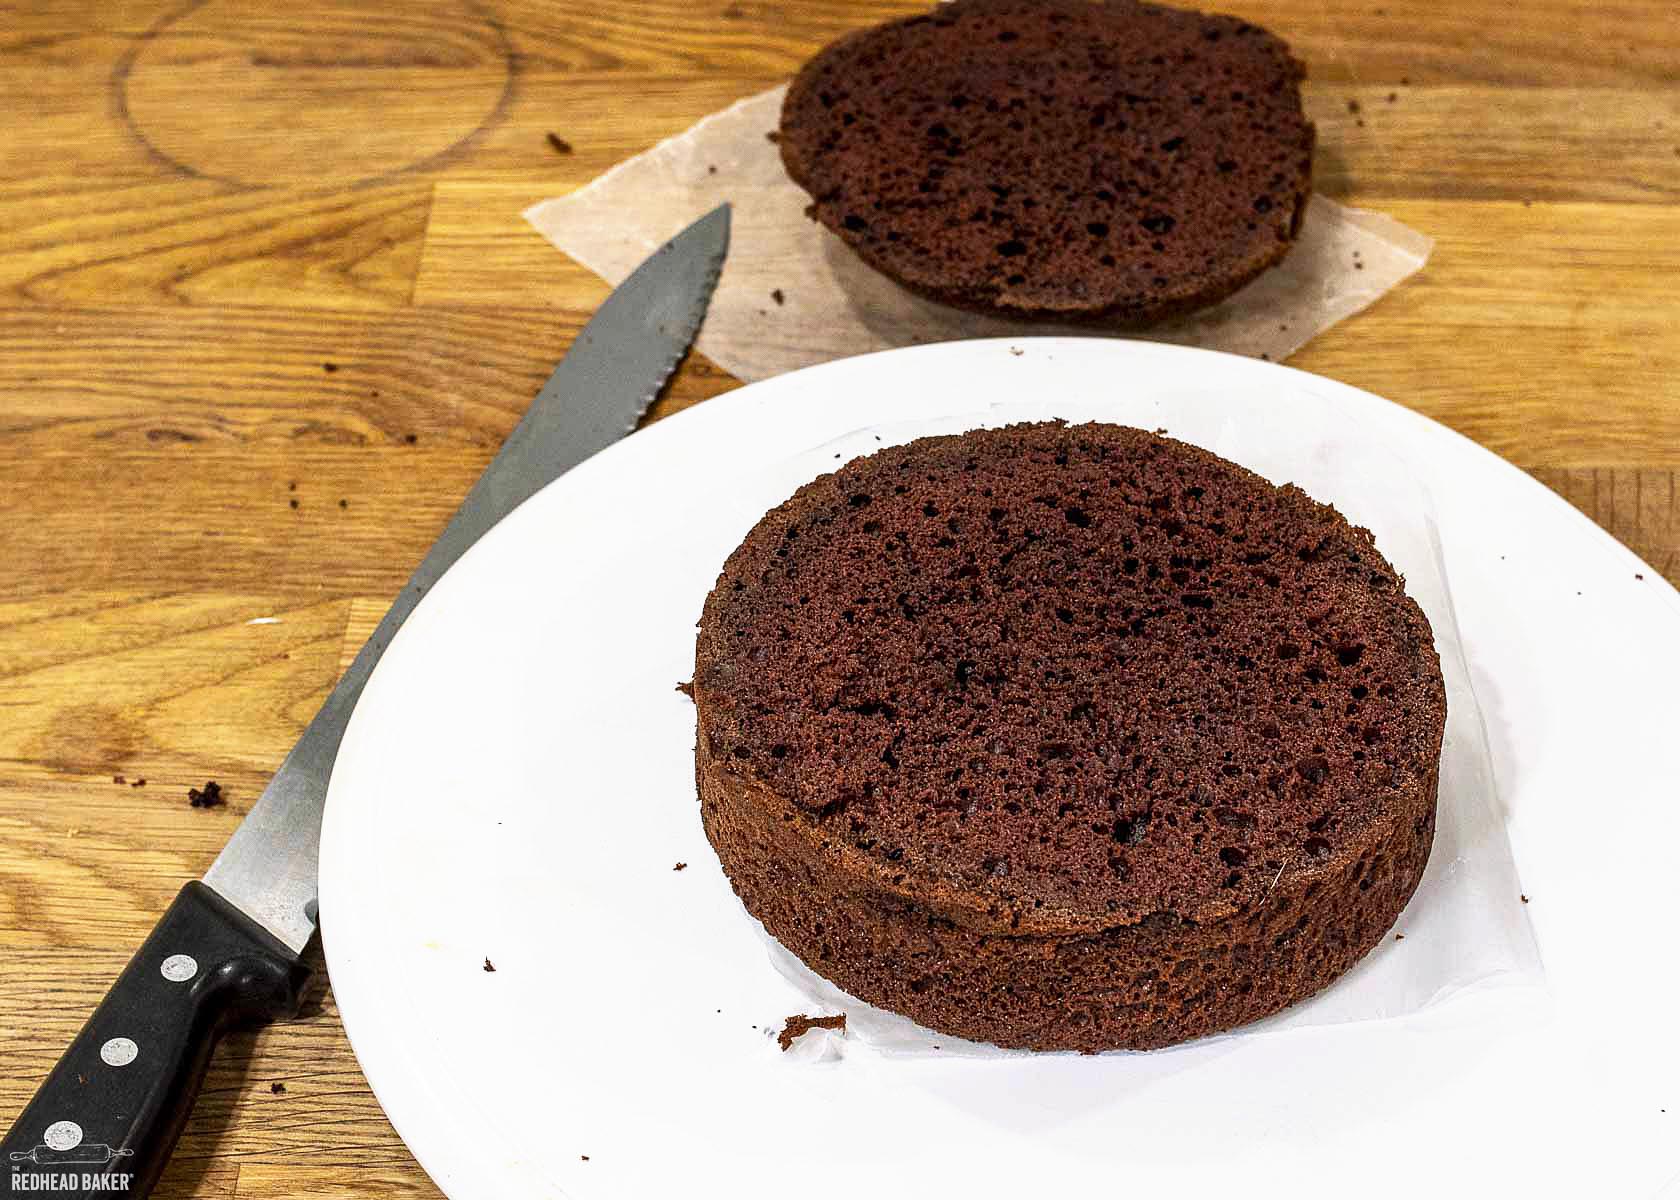

Once your cakes are level, you can stack them. The process is the same whether you're stacking two or three layers. Place one layer, cut-side-up, on your cake plate or stand. Spread some frosting (about half a cup of frosting for a 6-inch layer, ¾ cup of frosting for a 9-inch layer), then place the second piece of cake cut-side-down on the filling. If you're using a third layer, spread more of the frosting, then place the third layer of cake cut-side-down on top. Gently press the layers together.
Crumb-Coating a Cake
When frosting a cake, especially one you'll be using as a centerpiece or sharing with others (as opposed to one you're just making to enjoy at home), I recommend starting with a crumb coat.
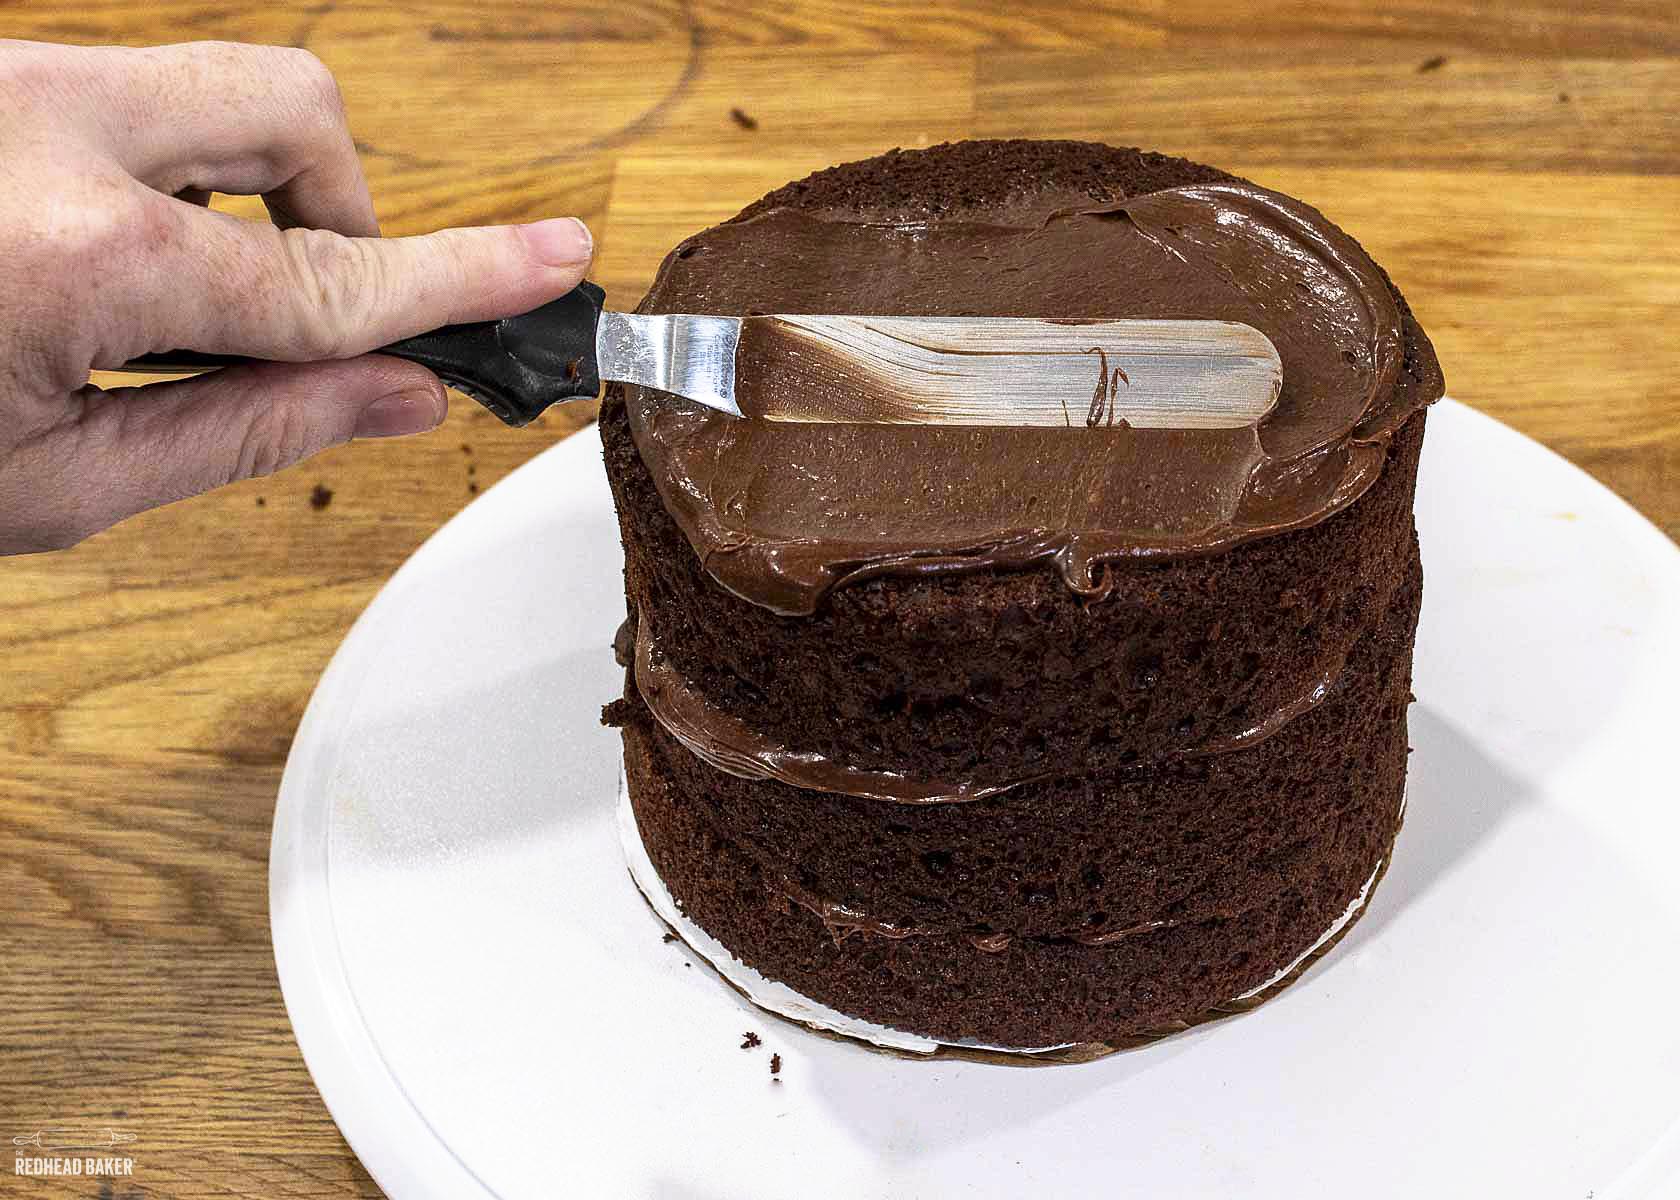

A crumb coat is a very thin layer of frosting that traps any loose crumbs. The cake is then chilled for 30-ish minutes, so the frosting sets hard, ensuring that those crumbs don't make it through your final coating of frosting.
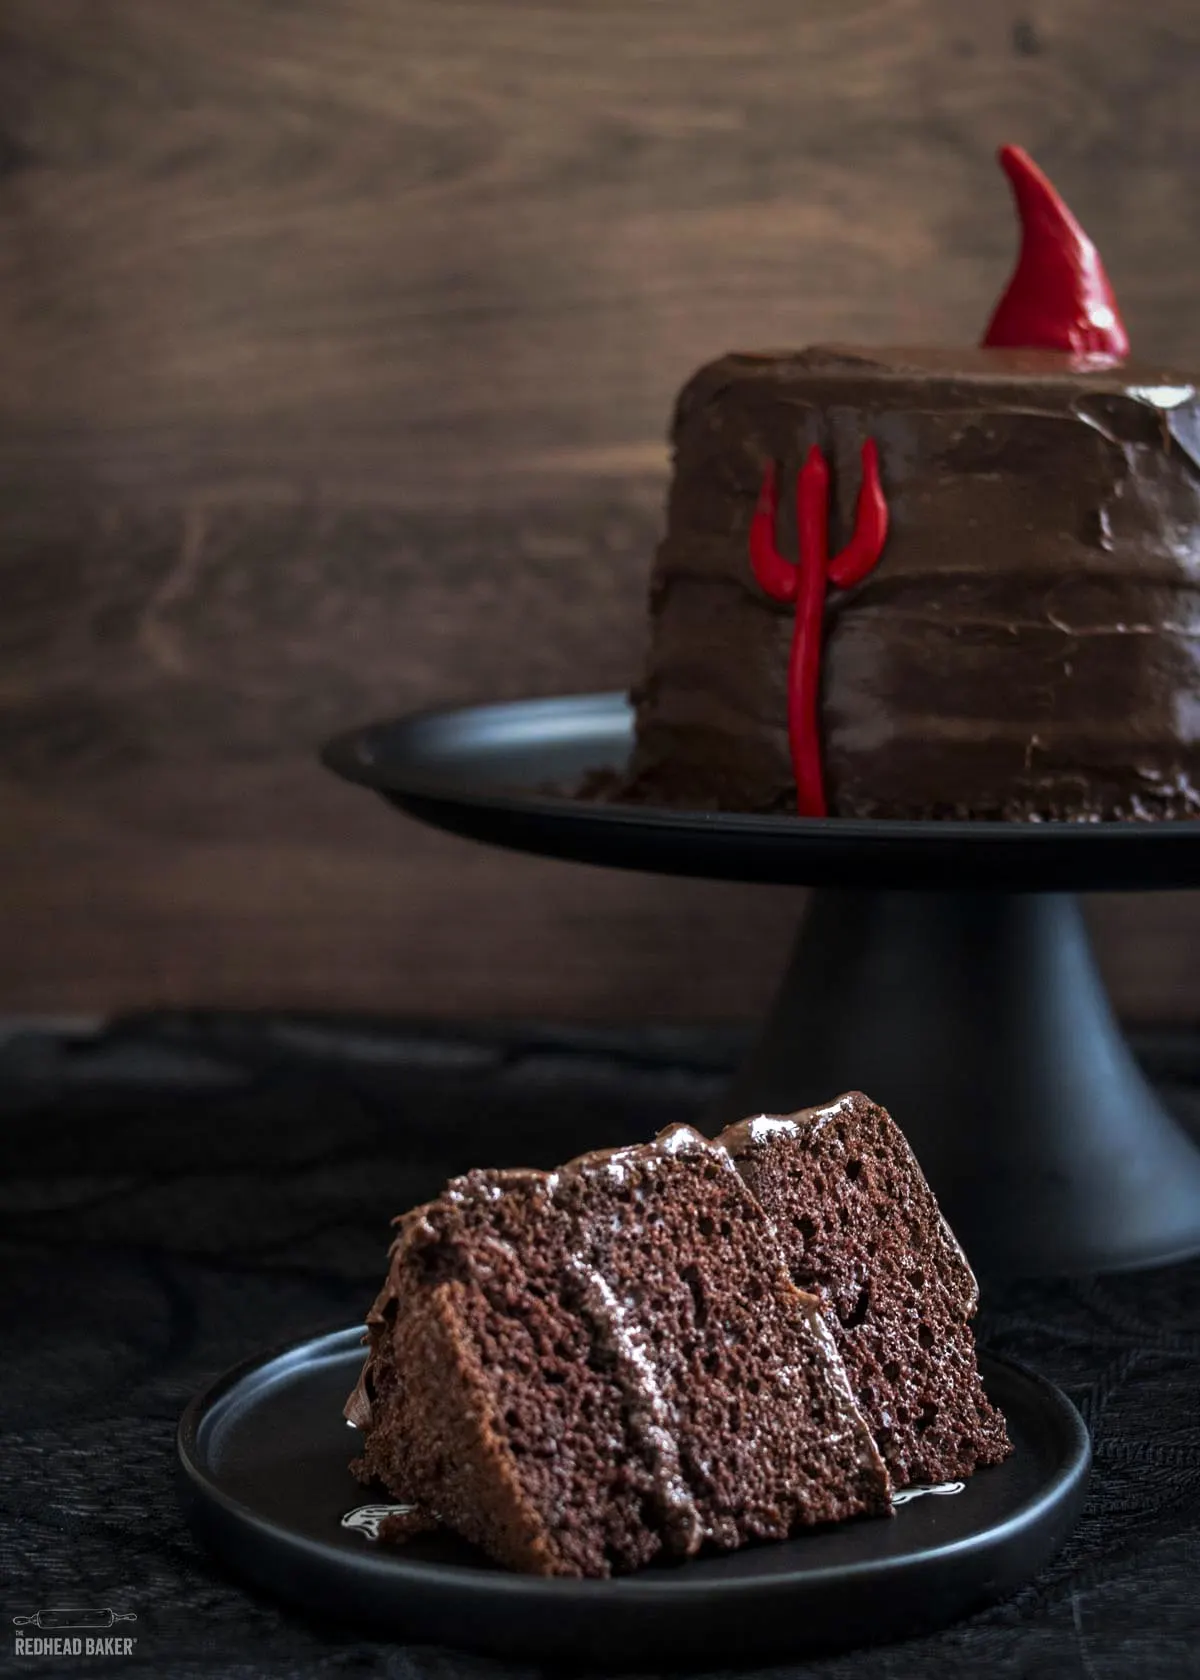
Decorating a Devil's Food Cake
To decorate this cake, you'll need about 4 ounces of red fondant. You can use store-bought fondant, or homemade marshmallow fondant, dyed with super-red gel food coloring.
While cookie dough and pie crust is rolled out on a flour-dusted surface, fondant should be rolled out on a surface smeared with vegetable shortening. It keeps the fondant soft and pliable.
Shape the tail and trident first, then shape the horns. I recommend doing the horns last because I would knead in a little tylose powder so that the fondant stiffens as it dries, and the horns will keep their shape.

Equipment
I baked my cake layers in 6-inch aluminum cake pans with 2-inch high sides. I only have two, so once the cakes cooled, I removed them, washed one of the pans, and baked the third layer.
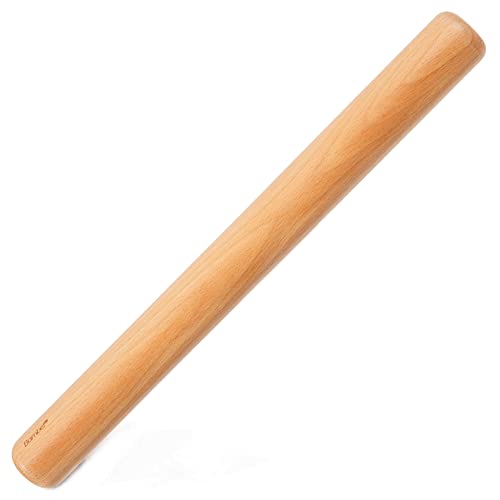
I roll my fondant on a non-slip pastry mat with a wooden rolling pin. I cut the pieces for the tail and trident with a ruler and a paring knife.
Storage
If you're making this cake ahead of time, storage depends on the type of frosting you use. If the frosting requires refrigeration, wrap the cake loosely in plastic wrap before storing in the fridge to prevent the fondant from cracking.
If the frosting doesn't require refrigeration, store the cake under a cake dome in a cool, dry place out of the sun.
Devil's Food Cake
Some simple fondant decorations can turn a decadent Devil's Food Cake into a Halloween party centerpiece!
Ingredients
For the cake:
- 12 tablespoons (6 oz/170 g) unsalted butter, at room temperature
- 1 ¾ cups (12 oz/347 g) white sugar
- ½ teaspoon table salt
- 2 cups (8.5 oz/240 g) all-purpose flour
- ¾ cup (2.25 oz/64 g) Dutch-process cocoa
- 2 teaspoons baking powder
- 4 large eggs, at room temperature
- 1 ½ cups (12 fl oz/355 mL) milk at room temperature
- 2 teaspoons vanilla extract
For the frosting:
- 2 cups (14 oz/397 g) sugar
- 1 cup (3 oz/85 g) unsweetened cocoa powder
- 1 cup (8 fl oz/237 mL) whole milk
- ½ cup (4 oz/113 g) unsalted butter, cut into pieces
- ¼ cup (2 fl oz/60 mL) light corn syrup
- ¼ teaspoon salt
- 2 teaspoons vanilla
- 2 ½ to 3 cups (10 to 12 oz/283 to 340 grams) confectioners sugar
For the decoration:
- 4 oz red fondant
- ¼ teaspoon tylose powder (optional)
Instructions
- Preheat the oven to 350°F. Spray three 6" round cake pans with non-stick baking spray.
- In a large mixing bowl, beat together the butter, sugar, and salt until fluffy and light, beating for at least 5 minutes.
- In a separate bowl, whisk together the flour, cocoa, and baking powder. If lumps remain, sift the mixture.
- Add the eggs to the butter mixture one at a time, beating well after each addition.
- Mix together the milk or water and the vanilla.
- Add one-third of the flour mixture to the batter, then add half the milk, another third of the flour, the remaining milk, and the remaining flour, stirring to combine after each addition. Scrape the sides and bottom of the bowl occasionally throughout this process. Divide the batter evenly between the prepared pans.
- Bake the layers for 25 to 30 minutes, until a cake tester or toothpick inserted into the center comes out clean, and the cake begins to pull away from the sides of the pan.
- Remove the layers from the oven, cool them for 5 to 10 minutes, then remove them from their pans to a wire rack. Cool completely, then place on cake boards and freeze for 20 minutes while you make the frosting.
- Make the frosting: In a large saucepan, mix the sugar and cocoa. Stir in the milk, cubes of butter, corn syrup and salt. Heat over medium-high heat to boiling, stirring frequently. Cook at a boil for 3 minutes, stirring occasionally. Remove the saucepan from the heat, and cool for 1 hour.
- Add the vanilla and 2 cups of the powdered sugar. Beat until incorporated. Add more powdered sugar, ¼ cupful at a time, and beating until you reach a spreadable consistency.
- After partially-frozen, trim the domes from the cakes.
- Place one cake layer cut-side-up, spread a half-cup of frosting, place another cake layer cut-side-down, spread another half-cup of frosting, then place the last layer cut-side-down on top. Gently press the layers together.
- Spread a thin layer of frosting over the stacked cakes. Chill for 30 minutes.
- Spread a thicker layer of frosting over the cake, then chill again.
- If using tylose powder, knead into the fondant until fully incorporated.
- Pinch off a small piece of fondant, and roll it into a thin rope. Pinch off another piece and shape it into a triangle. Attach the two with a dab of water to make the devil's tail.
- Pinch two more pieces of fondant, one larger than the other. Roll both into thin logs, one long and one short. Curve the shorter one into a U-shape, and place over the longer log, pressing the top piece onto the bottom, so that the tips of all three align at the top. Pinch the tops into points to make the devil's trident.
- Pinch off two more pieces of fondant, each about the size of a golf ball. Shape into horns thicker at the bottom and pointy at the top.
- Press the trident into the side of the cake. Curve the tail onto the other side of the cake.
- Place the horns on the top of the cake. Cover loosely until ready to serve.
Recommended Products
As an Amazon Associate and member of other affiliate programs, I earn a small percentage from qualifying purchases.
-
 Black Enamelware Cake Stand
 -
 Satin Ice Rolled Fondant - Red - Vanilla - 1 kg
 -
 Wilton Aluminum 2 x 6-inch Layer Cake Pan Set, 2- Piece
 -
 Wilton 3-Tier Cooling Rack for Cookies, Cakes and More
 -
 Bamber Wood Rolling Pin, 11 Inch by 1-⅕ Inch
 -
 Mrs. Anderson's Baking Non-Slip Pastry Rolling Mat, 18-Inch by 24-Inch
Nutrition Information:
Yield: 8 Serving Size: 1Amount Per Serving: Calories: 400Total Fat: 21gSaturated Fat: 13gTrans Fat: 1gUnsaturated Fat: 7gCholesterol: 143mgSodium: 516mgCarbohydrates: 43gFiber: 1gSugar: 18gProtein: 8g
I am not a certified nutritionist. This nutrition information is automatically calculated by third party software and is meant as a guideline only.
#HalloweenTreatsWeek
HAPPY HALLOWEEN!!!
Welcome to 2023’s #HalloweenTreatsWeek event!
If you're new here, Welcome! If you're a returning haunt, welcome back!
#HalloweenTreatsWeek is a yearly Halloween blogging event that is hosted by Angie from Big Bear’s Wife . You'll find that this fun and spooky event is an online, week-long event that is filled with some frightfully fun Halloween treats and recipes from some fantastic Halloween loving bloggers!
For this year's 6th annual #HalloweenTreatsWeek event, we have 18 hauntingly talented bloggers that are sharing their favorite Halloween recipes throughout the week! You can following the hashtag #HalloweenTreatsWeek on social media to collect all of these frightful recipes to use at your own Halloween parties and events!
Make sure to check out all of the fun Halloween recipes that we're sharing this week!
Today's Halloween Offerings:
- Halloween Chocolate Covered Strawberries from Big Bear's Wife
- Frankenstein Apple Slice Pops from Semi Homemade Recipes
- Spellbound Sangria from Our Good Life
- Maple Mummy Cupcakes Cones from Sweet ReciPEAs
- Chocolate Peanut Butter Spider Bites from Karen's Kitchen Stories
- Pumpkin No Bake Cookies from Best Cookie Recipes
- Eyeball Halloween Pumpkin Cake Pops from Jen Around the World