
I am so mad at myself. I dropped my camera a few weeks ago. The body itself is (mostly) fine, but I broke my zoom lens. Now, I know that I'm not publishing the highest-quality photos on this blog, but the quality I get with the kit lens just isn't the same.
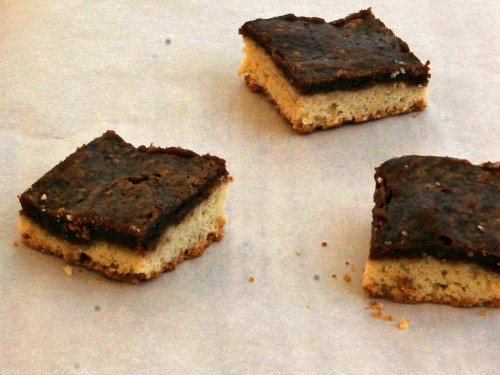
Which is a shame, because the photos of these gooey Nutella cake bars really don't do the treats justice.
I saw a version of these bars on Eva Bakes, which were adapted from a recipe seen on Bake Your Day. Both used Biscoff, a spread made from speculoos cookies (brown-sugar and spice-flavored cookies, similar to gingersnaps). It has a consistency similar to peanut butter or Nutella.
We were having a last-minute potluck luncheon at work, and I signed up for the "cookies/brownies" category. I didn't want to bring in the typical chocolate chip cookies, or plain brownies. I remembered the cake bars I saw on Eva's blog, and I happened to have everything I needed to make the bars, except the Biscoff. So instead, I used Nutella.
These were really popular at our luncheon! Like Eva, my cake layer came out a bit dry. I checked my cake after 25 minutes, but the Nutella layer needed more time. But the gooey Nutella layer helps offset the dryness of the cake.
The cake "batter" is almost as thick as cookie dough, and I found it easiest to use an offset spatula to spread the batter around the baking pan.
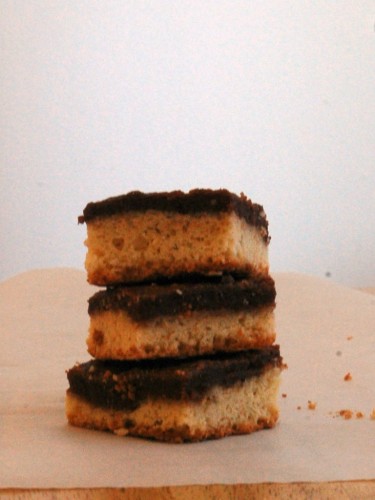
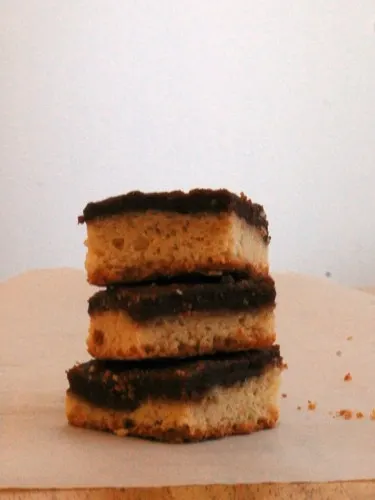
Gooey Nutella Cake Bars
Adapted from Eva Bakes
Ingredients
- Cake layer
- 2 cups cake flour
- ½ cup sugar
- 2 teaspoon baking powder
- ½ teaspoon salt
- 1 egg
- 8 tablespoon unsalted butter, melted
- 2 tablespoon milk
- 1 teaspoon vanilla
- Gooey Nutella layer
- 8 ounces cream cheese, softened
- 2 eggs, lightly beaten
- 1 teaspoon vanilla
- ½ cup Nutella
- 2 cups powdered sugar, sifted
Directions
- Preheat your oven to 350 degrees. Line a 9x13 baking pan with parchment paper.
- Place the flour, sugar, baking powder and salt in the bowl of a stand mixer. Mix on low speed until evenly distributed.
- Add the egg, melted butter, milk and vanilla, and beat on medium just until combined. Use an offset spatula to spread the batter in an even layer in the baking pan.
- In the bowl of a stand mixer, beat the cream cheese until smooth. Add the eggs, vanilla and Nutella, and beat until all the ingredients are well-incorporated and uniform in texture.
- Drop the mixer speed to low, and gradually mix in the powdered sugar just until incorporated. Do not overmix.
- Scrape the Nutella mixture into the baking sheet on top of the cake layer, and spread into an even layer with an offset spatula.
- Place the baking sheet in the oven, and set the timer for 35 minutes. Check the cake after 25 minutes, and continue baking if not done yet. The cake is done when the top is shiny and edges are set.
- Remove the pan from the oven and set on a wire rack to cool.
- Store in an airtight container at room temperature for up to one week.
- Cut into 2-inch by 1-inch pieces before serving.
Number of servings (yield): 12
Kylee
Friday 19th of July 2013
Yum!
Eva @ Eva Bakes
Friday 19th of July 2013
I love that you used Nutella instead of Biscoff! It's a shame that both of our cake layers turned out to be a bit dry. Perhaps next time I'll add some Greek yogurt or applesauce to increase the moisture content. Either way, I'm thrilled that your coworkers enjoyed them!