This post is sponsored in conjunction with #BrunchWeek. I received product samples from sponsor companies to aid in the creation of the #Brunchweek recipes. All opinions are mine alone.
This peach custard tart has a crumbly cookie crust and a creamy custard filling loaded with tender peach slices. It's a delicious end to any meal!

It’s BrunchWeek time again, hosted by Terri of Love and Confections. This is my third year participating, because brunch is my favorite meal. We have several great sponsors this year, who’ve generously donated some wonderful prize packages, which you can read about on my giveaway page. Update: giveaway has ended.

I'm a firm believer that dessert should be served at every meal, brunch included. It could be as simple as a fruit parfait, but this peach custard tart is just as easy and incredibly delicious. An almond-flavored cookie-like crust holds tender peaches and a creamy filling.
This peach custard tart was inspired by a pie I made for culinary school some 10 years ago — a pear custard pie. I'm normally not a fan of pears, but the pie was delicious. I changed the pie crust to a tart shell, as it seems much more suited to a brunch, and chose a seasonal fruit.
I used frozen peaches in this recipe because I had two bags taking up space in my freezer. If you do choose to use fresh peaches, there's no need to peel them. The skin of a peach practically melts into the flesh of the fruit when cooked. Just halve, remove the pit, then cut into ¼- or ½-inch slices.
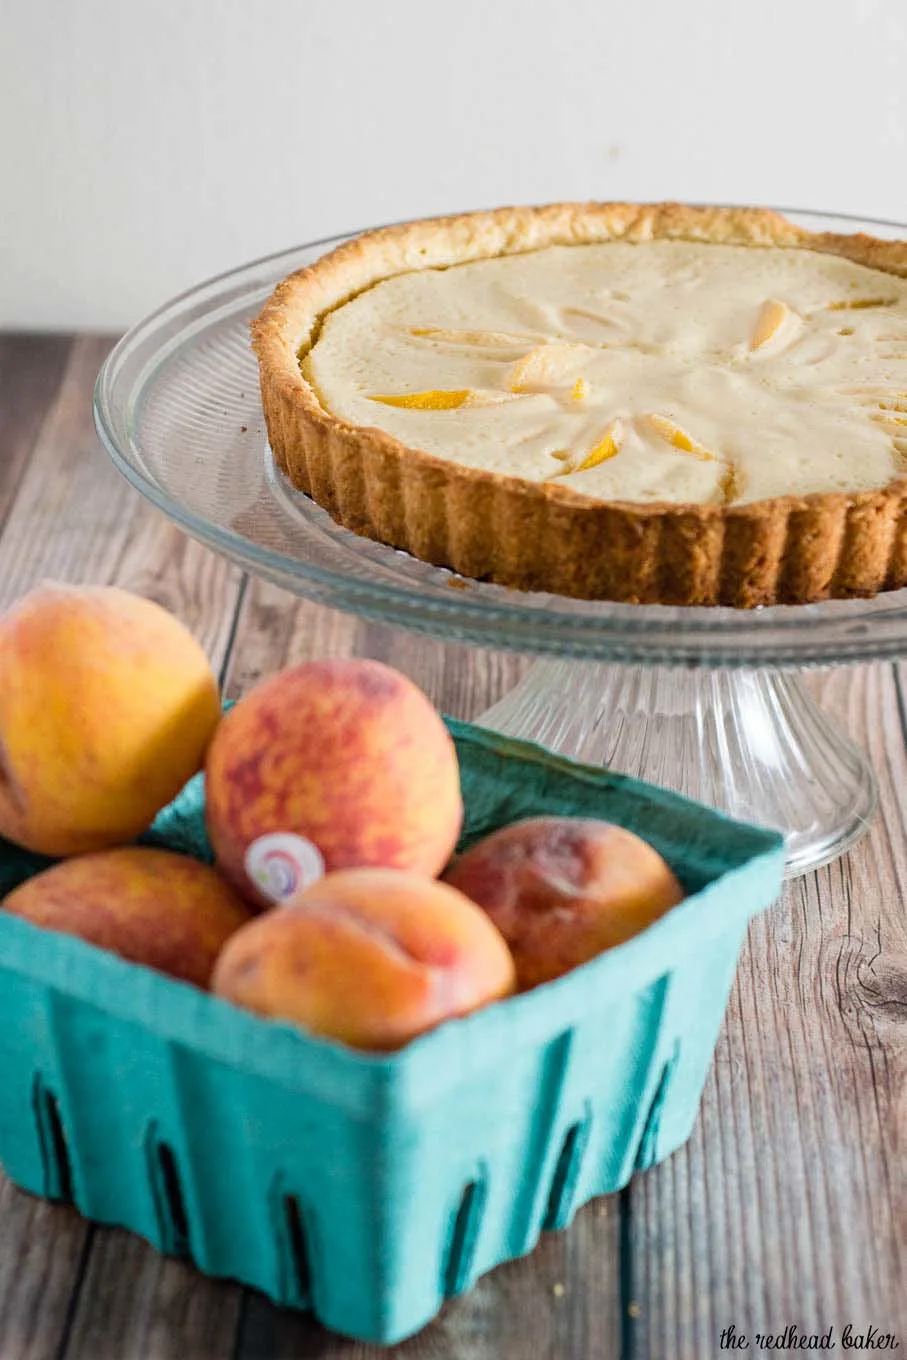
The almond flavor complements the peaches wonderfully, but if you can't have almond extract due to allergy issues, simply substitute an equal amount of vanilla extract, and it will still be delicious.
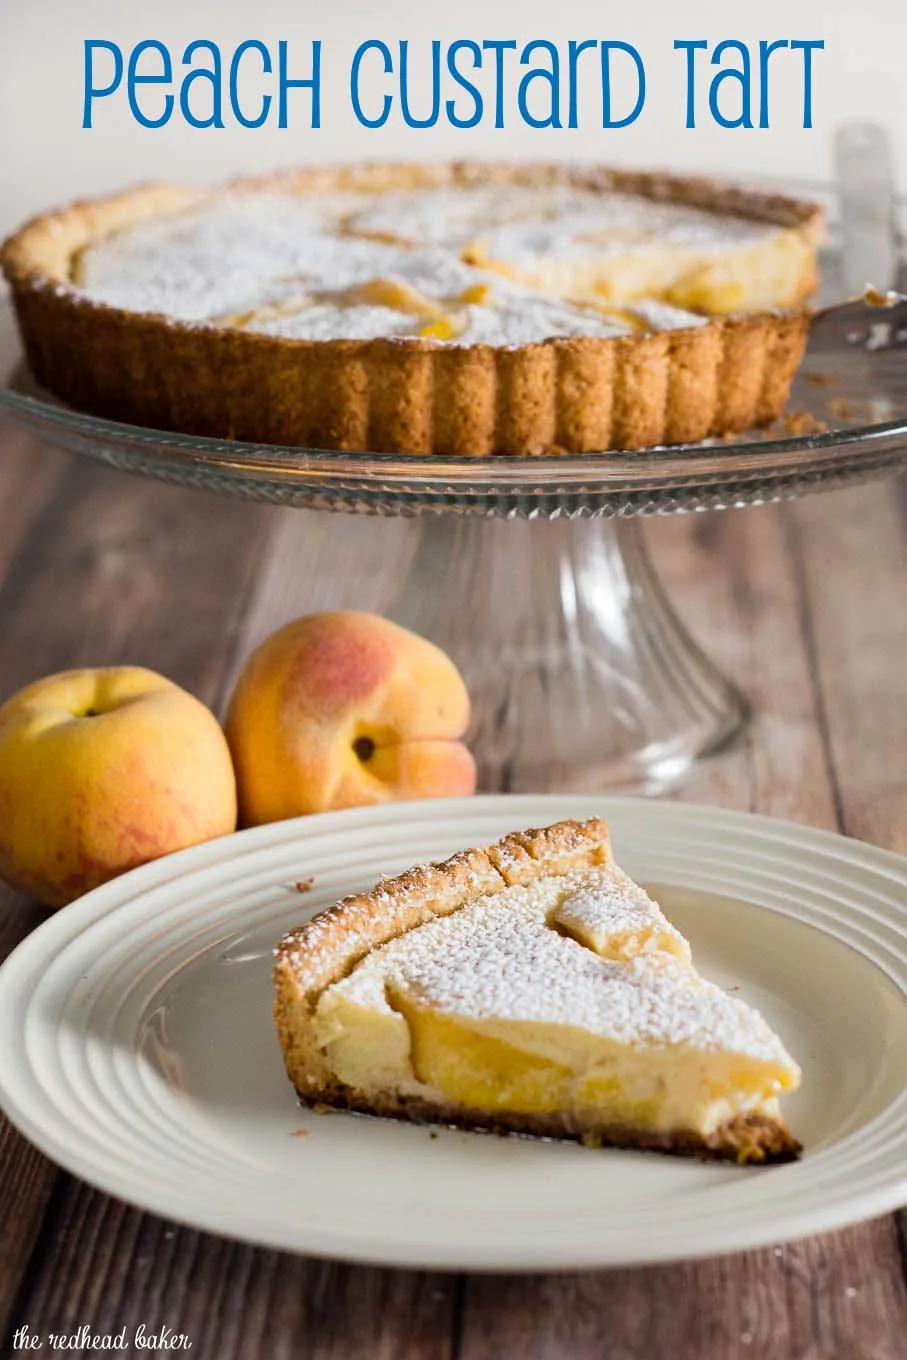
Don't dust the peach custard tart with confectioners sugar until just before serving, or else it will absorb into the tart. It won't hurt the tart, but you won't get the pretty effect.
Peach Custard Tart
Tools needed: food processor, 9-inch tart pan with removeable bottom
Ingredients
For the tart shell
- 1 ¼ cup all-purpose flour, 6 ¼ ounces
- ¼ cup sugar, 1 ¾ ounces
- ¼ teaspoon salt
- 4 oz unsalted butter, chilled, cut into cubes
- 2 large egg yolks
- 1 teaspoon Nielsen-Massey vanilla extract
- 1 teaspoon Nielsen-Massey almond extract
- 1 teaspoon water, plus more if needed
For the filling
- 2 lbs frozen peach slices, thawed, NOT frozen in syrup
- 1 large egg
- ¼ cup sugar
- 3 tablespoon all-purpose flour
- ¼ cup heavy cream
- 1 teaspoon Nielsen-Massey almond extract
- Pinch of kosher salt
- Powdered sugar, for serving
Instructions
Make the tart shell
- Place the flour, sugar and salt in the bowl of a food processor. Pulse a few times to combine.
- Add the cubed butter, and pulse 8 to 12 times, until the mixture resembles coarse crumbs.
- In a measuring cup, whisk together the egg yolks, extracts and water. Add to the food processor, and pulse just until the mixture starts forming large clumps. Take a small portion out of the bowl, and squeeze it. If the clump holds together, it's done. If it falls apart, add another teaspoonful of water and pulse a few times, and repeat the squeeze test. If it still doesn't hold together, add a third teaspoonful of water and repeat.
- Once the dough holds together when squeezed, transfer it from the bowl to a sheet of plastic wrap. Form the dough into a 6-inch round, flatten, and wrap in the plastic. Refrigerate for at least 30 minutes, or up to overnight.
- Take the dough disk out of the refrigerator. If it was chilled overnight, let it sit at room temperature for 10 minutes before continuing.
- Place the dough between two pieces of waxed paper, parchment paper, or plastic wrap at least 14 inches wide. Roll it into an 11-inch round, rotating it (and the paper) clockwise slightly after each roll to create an even round. Roll from the center outward and to lift the rolling pin at the edge to avoid smashing the edge into the paper, which will make removing the paper or plastic difficult.
- As you roll, the paper or plastic wrap will get wrinkled into the dough. When this happens, peel it off, smooth out the wrinkles and lay it back on the dough. Flip the dough over and repeat, if necessary, with the top piece. Continue to roll, flipping and smoothing wrinkles as necessary, until the dough is 11 inches across and between ⅛ and ¼ inch thick. If the dough is soft and sticky, transfer it to a baking sheet and chill it for 30 minutes. Peel off the top piece of paper or plastic. Leave the bottom piece attached. Lift the dough by the exposed paper or plastic and flip it over and center it over the tart pan as best you can, then remove the paper or plastic.
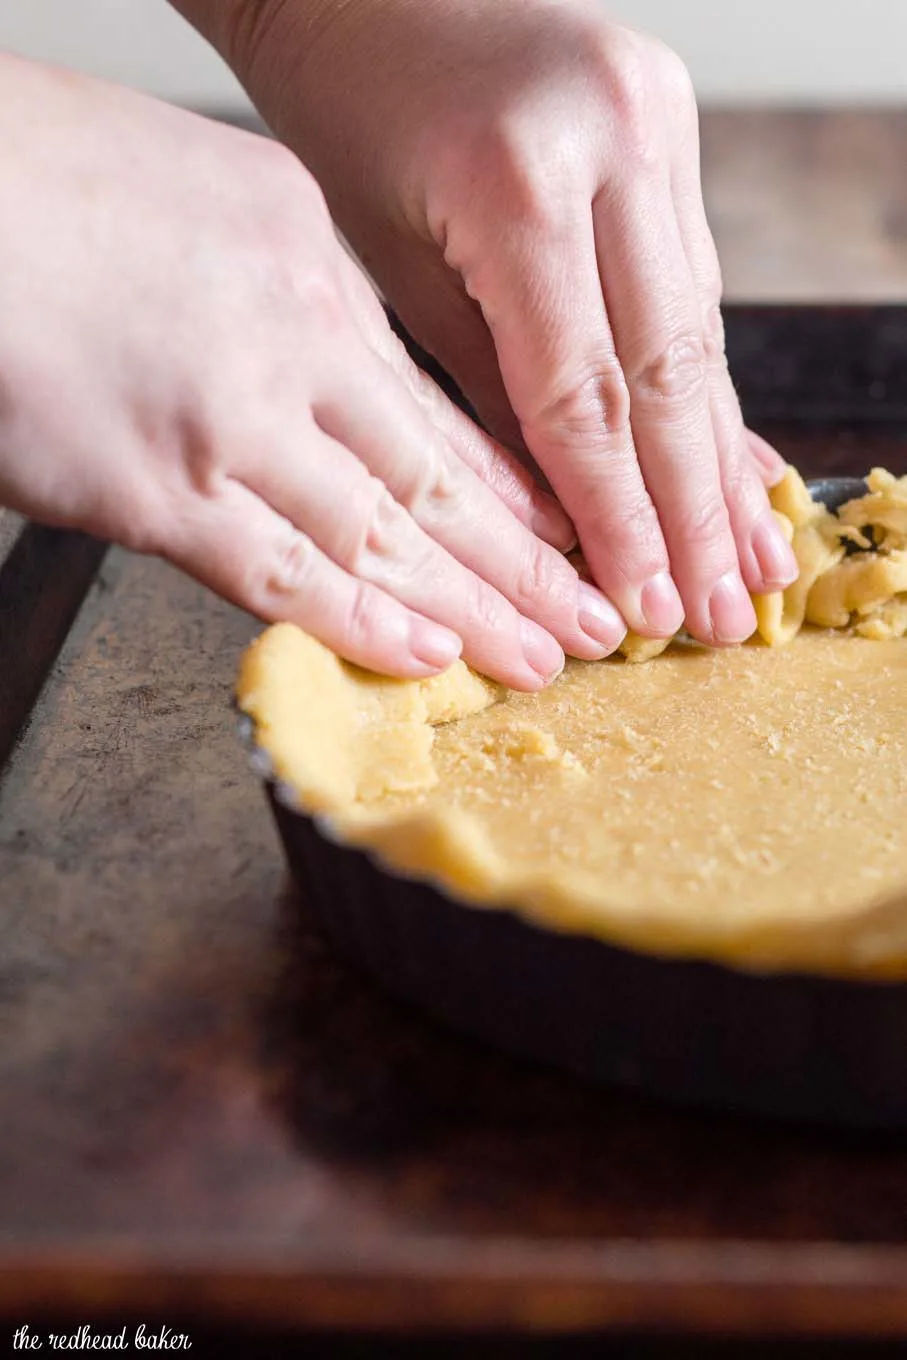
- Ease the dough across the bottom of the pan and up the sides, pressing it into the corners of the pan with your fingertips. If the dough breaks or cracks, just press it together again. Once the dough is even in the pan, fold the excess dough at the edge inward to create a double layer of dough along the wall. Press firmly with your thumbs to fuse the two layers of dough, then roll your thumb over the rim of the pan to remove any excess dough there. Save the excess dough in case a crack forms in the crust during baking. Refrigerate for 1 hour or freeze for 30 minutes before baking.
- Preheat the oven to 375°F and position a rack in the bottom third. Lightly prick the shell all over with the tines of a fork. Line the shell with heavy-duty foil, pressing the foil firmly and smoothly into the crevices of the pan. Fill the pan with pie weights or dried black beans. Make sure the weights reach up the sides to the rim of the pan (the center does not need to be filled quite as full). Bake the shell for 20 to 22 minutes, until the foil comes away from the dough easily (if it doesn"t, bake another 5 to 6 minutes and check again). Remove the pan from the oven (hold the pan by the sides and not the bottom), and lift out the foil and weights from the shell; set them aside to cool.
- Return the pan to the oven to continue baking the shell for about 10 minutes, then remove the pan from the oven, and check to see if any cracks have formed. If you see a crack, very gently smear a tiny bit of reserved dough over the crack to patch it. Return the pan to the oven and bake 10 to 15 minutes longer, until the crust is a nice golden brown all over. Transfer to a rack and cool completely.
- Reduce the oven temperature to 350 degrees. Arrange the peach slices, overlapping, in circles in the cooled tart shell. You may not need all of the slices.
- In a small bowl, beat the egg with the ¼ cup of sugar until thick and pale. Beat in the flour, then the cream, almond extract and salt. Pour over the peach slices.
- Bake for 10 to 15 minutes, until the custard is set. Remove the pan to a wire rack to cool to just warm to the touch or completely to room temperature. Just before serving, dust with powdered sugar.
Take a look at what the #BrunchWeek Bloggers are creating today!
BrunchWeek Beverages:
Almond Joy Iced Coffee from Hardly A Goddess
Rose Water & St. Germain Champagne Cocktail from The Barbee Housewife
BrunchWeek Egg Dishes:
Asparagus Topped Eggs with Hats from That Skinny Chick Can Bake
Huevos Gratinados from Palatable Pastime
BrunchWeek Breads, Grains and Pastries:
Apple Banana Streusel Bread from Family Around the Table
Crispy Apple Cheesecake Danish from A Kitchen Hoor’s Adventures
Gooey Lemon Blueberry Pull-Apart Bread from Girl Abroad
German Apple Pancake from Sew You Think You Can Cook
Overnight Raspberry French Toast from Hezzi-D's Books and Cooks
Peach Custard Tart from The Redhead Baker
Pecan Gingerbread Buns from Jane's Adventures in Dinner
Pineapple Sweet Rolls from Cooking with Carlee
Raspberry and Chocolate Grilled Cheese from Brunch-n-Bites
Cinnamon Apple Sourdough Waffles from My Catholic Kitchen
Southwestern Style Farro Breakfast Bowl from Cooking in Stilettos
Apple, Grape, and Walnut Chicken Salad from Love and Confections
Green, Eggs and Ham Burrito from Nik Snacks
BrunchWeek Fruits, Vegetables and Sides:
Apple & Grape Breakfast Salad from The Chef Next Door
Cheddar Broccoli Soup from Cindy's Recipes and Writings
Fully Loaded Stuffed Potatoes from A Day in the Life on the Farm
BrunchWeek Desserts:
Champagne Pound Cake with Rose Water Frosting from Sweet Beginnings
Lemon Cheesecake Parfaits from Cookaholic Wife
Lemon No Bake Cheesecake from Feeding Big
Disclaimer: Thank you to #BrunchWeek Sponsors: Red Star Yeast, Dixie Crystals, Cabot Cheese, Nielsen-Massey, Rainier Fruit, and Michigan Asparagus for providing the prizes free of charge. These companies also provided the bloggers with samples and product to use for #BrunchWeek recipes. All opinions are my own. The #BrunchWeek giveaway is open to U.S. residents, age 18 & up. All entries for the winner will be checked and verified. By entering you give the right to use your name and likeness. The number of entries received determines the odds of winning. Six winners will be selected. The prize packages will be sent directly from the giveaway sponsors. The #BrunchWeek Bloggers are not responsible for the fulfillment or delivery of the prize packages. Bloggers hosting this giveaway and their immediate family members in their household cannot enter or win the giveaway. No purchase necessary. Void where prohibited by law. This promotion is in no way sponsored, endorsed or administered by, or associated with Facebook, Instagram, Pinterest, or any other social channel mentioned in the #Brunchweek posts or entry.

Wendy Klik
Monday 22nd of May 2017
This looks so good. I love using almond flavoring in my cookie crusts.
Christie
Sunday 14th of May 2017
PEACHES! They're my second fave fruit only to pears. I think I need a tart pan now. Because I have GOT to try this.
Jennifer
Saturday 13th of May 2017
Sounds wonderful! Read through your lovely recipe with interest.
Caroline Barbee
Friday 12th of May 2017
These photos are seriously incredible!! I bet it tastes delicious, too!
Liz @ Books n' Cooks
Thursday 11th of May 2017
I never would have thought of this combination, but I love it!