Reclaim the lost art of making bread dough by hand! No electric mixer or bread machine is needed to make this delicious pizza dough.

Have you ever seen a yeast bread recipe that mixes in either a mixer or a bread machine, and skipped over it because you don't have that appliance? After this post, you'll never have to do that again.
Yeast breads have been baked long before the invention of mixers or bread machines. It's time to reclaim the lost art of baking bread by hand.
When I was in culinary school, "bread station" was one of my favorites. I didn't always understand what I was doing or why I was doing it. But there are so many different things to make with only a few simple ingredients.
I decided to demonstrate this process with you by using my favorite homemade pizza dough recipe from Annie's Eats. In all of the pizza recipes you'll find on my blog, that's the crust I use.

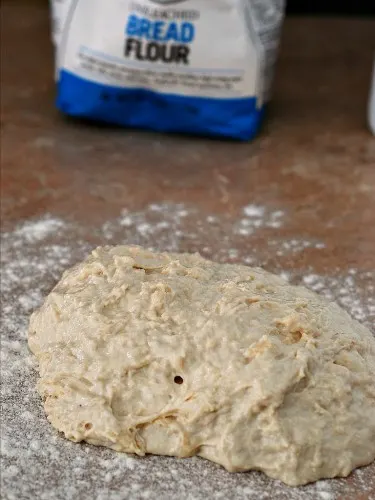
Unkneaded dough
All that the dough hook on a stand mixer or a bread machine basically does is mix and knead the dough for you. Kneading is a process of working the dough to create chains of gluten. These chains are what create the structure of bread. If you didn't knead the bread, your dough would not rise.
How do you knead? Well, you pull fold the back of the dough up over the front, and push it away from you with the heel of your hand, give it a quarter turn, and repeat. Sound a little confusing? Here, I made a video:
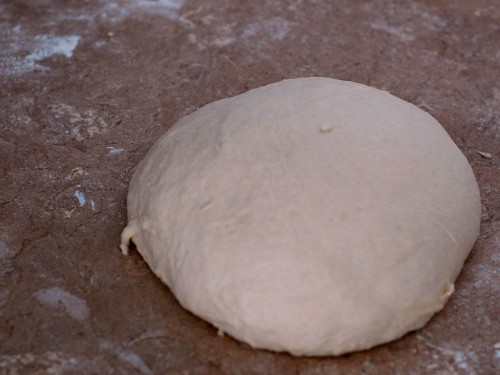
How do you know when you're done kneading? What does "smooth and elastic" mean? Under-kneaded dough is flopping, tears easily, and looks ragged. Well-kneaded dough holds its shape, bounces back quickly when poked, and if you stretch out a portion of the dough, it becomes almost see-through.
On the other hand, what about over-kneading? Good news -- it's almost impossible to over-knead dough. Why? You'll probably get tired before the dough gets to that point. If you're kneading dough in a machine, over-kneading can happen, and the dough will feel dense and won't fold. If that happens, let the dough rise a little longer than called for by the recipe, to let the dough relax.
There is no "magic number" for knowing when enough kneading is enough. Though yeast dough is finicky, it's surprisingly forgiving when it comes to kneading. Your dough can be a little under- or over-kneaded and still come out well.
And best of all, homemade pizza dough is (A) inexpensive to make and (B) keeps well in the freezer, so go ahead and practice all you want!

[amazon_link asins='B00P6EQW6G,B0017HUR9E,B009LPDNPO,B06XGV3RS4' template='ProductCarousel' store='theredheadbak-20' marketplace='US' link_id='132fb860-8581-11e8-bc1e-93edf70a3d6c']


Pizza Dough by Hand
Ingredients
- ½ cup warm water, 95 to 105 degrees
- 2 ¼ teaspoon instant yeast
- 4 cups bread flour, plus ¼ cup more if needed, 22 oz
- 1 ½ teaspoon kosher salt
- 1 ¼ cup room temperature water
- 2 tablespoon olive oil
Instructions
- Sprinkle the instant yeast over the warm water, stir, then set aside to dissolve for 5 minutes.
- In a mixing bowl, combine the 4 cups of bread flour, kosher salt, room temperature water and olive oil. Add the dissolved yeast, and mix well.
- Dust a clean work surface with bread flour. Scrape the dough onto the floured surface, and knead in a rhythmic manner for 8 to 10 minutes, until the dough is smooth and elastic. Shape dough into a ball, and place in a well-oiled mixing bowl. Spray the top of the dough with cooking spray, cover the bowl with plastic wrap, then with a kitchen towel. Set aside in a warm, dark area to rise for 90 minutes to two hours, until the dough doubles in size.
- Once risen, punch the dough down to remove as much air as possible. Divide the dough into two equal pieces.
- If not using immediately, roll each portion of dough into a tight ball. Wrap each in plastic wrap. Place both dough balls inside a gallon-sized zip-top freezer bag, and place in the freezer.
- On the day you plan to make pizza for dinner, preheat then oven (and your pizza stone!) to 500 degrees an hour before you plan to bake. Remove the plastic-wrapped dough ball from the freezer bag and place in the refrigerator first thing in the morning (if making pizza for lunch, put dough ball in the fridge the night before). Remove from the refrigerator and unwrap the plastic. Let sit at room temperature for 20 to 30 minutes. Then pat into a disk and stretch into a 12-inch circle.
- Top your pizza as desired, reduce the oven temperature to 450 degrees, and bake pizza for 12 to 18 minutes, until crust is golden brown. Cut into 8 slices.
Recipe from Annie's Eats
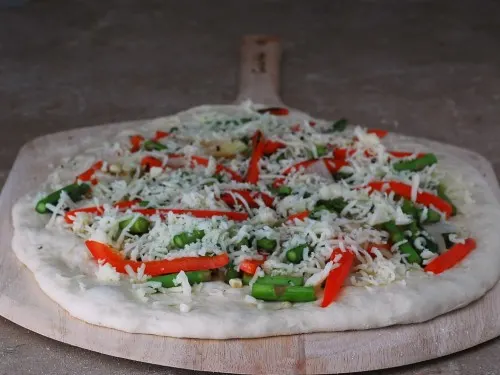
And in case you're wondering, the topped pizza is Cooking Light's Summer Veggie Pizza.
Bob
Friday 8th of January 2021
Hi Coleen,
Thanks for the recipe! I had to do 2 cups of water for 4 cups of water. And it made 3 12” crusts.
But it made the best pizza dough I’ve made! Curious why portions were off to yours.
Thanks, Alex
James
Sunday 24th of June 2018
My dough was chewy and tough after cooking. Any idea where I went wrong?
Heather
Friday 9th of March 2018
What if you don't have a mixer can you mix by hand.? I haven't made homemade dough since i was a kid.
Jason
Saturday 19th of January 2019
Heather, Did you read the recipe? It is called "Pizza Dough by Hand"
Sean
Tuesday 15th of August 2017
When making the pizza dough can I substitute AP flour for bread flour or will that make a big difference
The Redhead Baker
Tuesday 15th of August 2017
AP flour has a lower protein content level, so while your crust won't fall apart, it won't have the chewy texture you associate with pizza crusts.
Keri
Monday 27th of March 2017
I really want to try this recipe tonight, I only have active dry yeast and I am ignorant to the difference between this and instant yeast. Can I substitute and what modifications? Thank you for posting and taking the time to answer questions.
Coleen
Monday 27th of March 2017
Hi Keri,
In this recipe, you can substitute the same amount of active dry yeast for the instant yeast, and proceed with the recipe exactly as written. Instant yeast can be added to the flour without proofing in warm liquid (though this particular recipe isn't made that way) while active dry yeast won't work unless it's proofed in warm liquid.