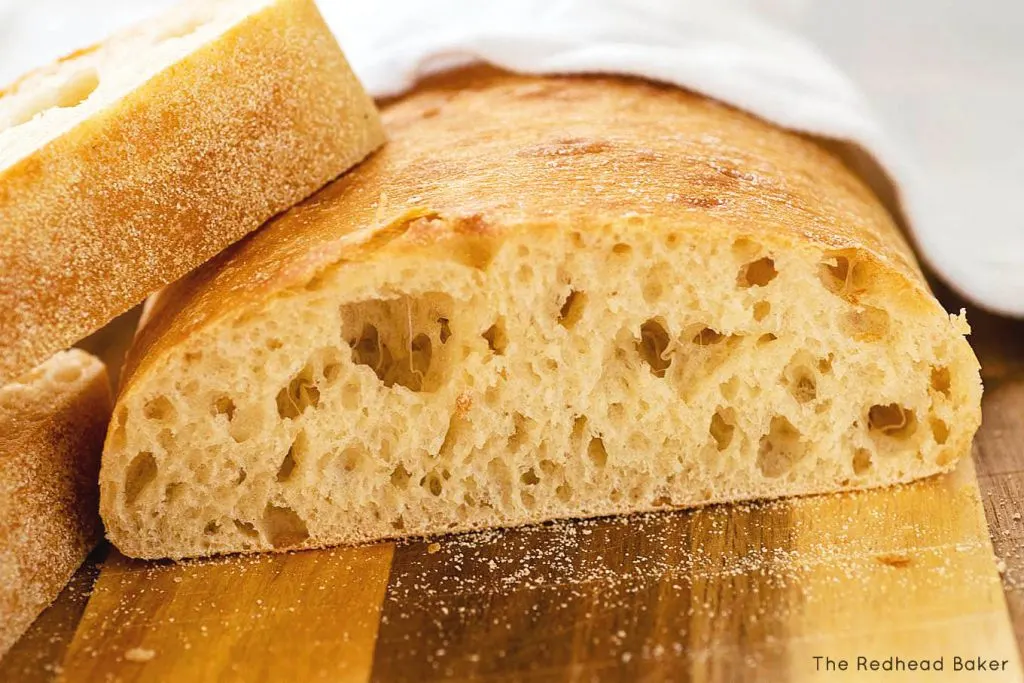
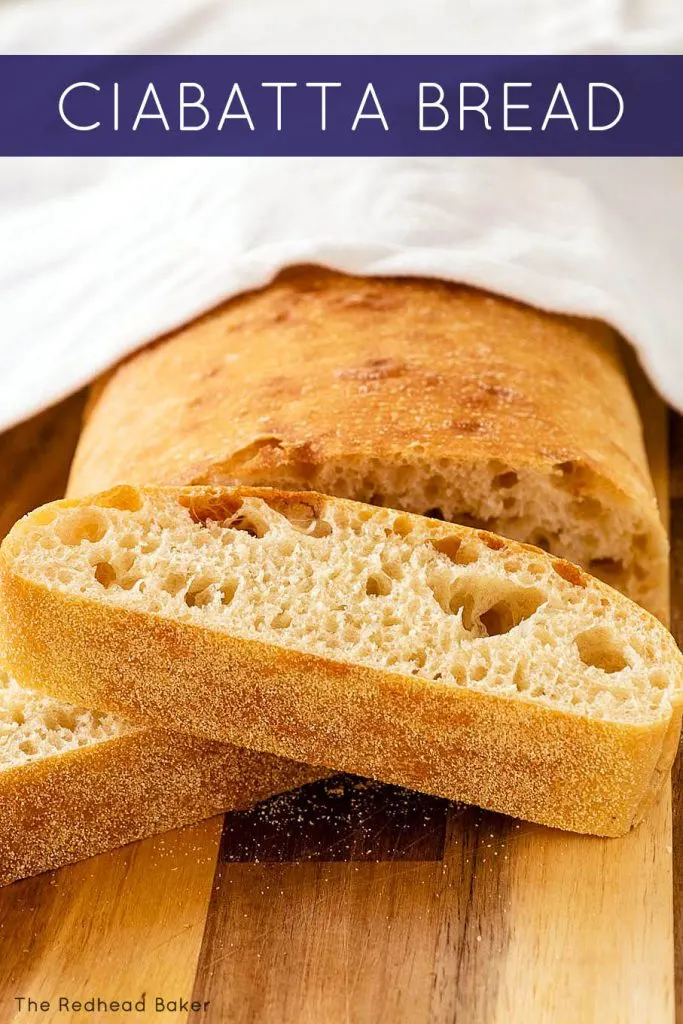
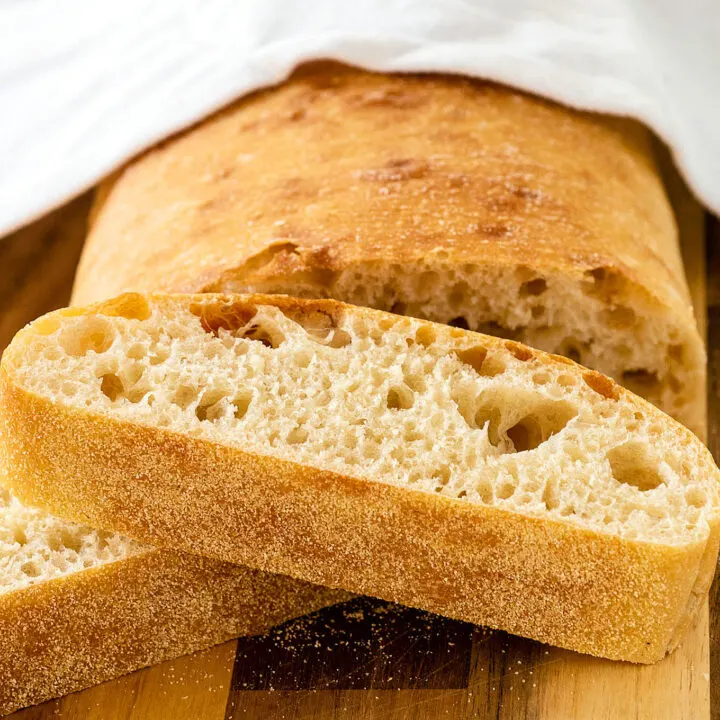
Ciabatta is a rustic, crusty Italian bread. The interior is marked with large air holes. It is delicious served warm, dipped in herbed olive oil.

One of my favorite Italian breads is ciabatta bread. "Ciabatta" means "slipper bread" because the dough is flat like an old-fashioned slipper shoe.
The exterior has a crisp crust, while the interior is tender and marked with large air holes called alveolar holes. These holes are a result of the bread's high hydration (ratio of liquid to dry ingredients).

If you've made other types of bread I've featured on my blog, you'll be familiar with what that dough felt like. How you were able to gather the dough into a ball that would hold its shape (more or less).
Ciabatta, on the other hand, is a very wet dough. It takes practice to strike the right balance between wet and dry ingredients. A dough that's not wet enough won't have that classic interior texture, and dough that's too wet will spread rather than rise.

What is a Poolish?
If you've read other bread recipes on my blog, they can generally be made in a day, if you have the time. Ciabatta begins with a poolish, a very wet pre-ferment of water or milk, yeast and flour.
This mixture developes over 24 to 96 hours, which helps develop the flavor of the bread. The longer the pre-ferment, the stronger the flavor.
The hydration of the poolish is described in percentages. A poolish that is equal parts liquid and flour is referred to as 100%. The parts are measured by weight rather than volume.

How to Work with Wet Dough
My first tip for working with wet dough is to slightly dampen your hands or any tools you'll use on the dough (dough scraper for scraping the bowl and lifting the dough, a pizza wheel or sharp knife for cutting the dough).
You'll also want to keep a bowlful of extra flour nearby for dusting. You'll use this as a buffer between the dough and the work surface, but it shouldn't be kneaded into the dough. Too much flour will give your ciabatta a denser crumb (interior texture).

Shaping Ciabatta
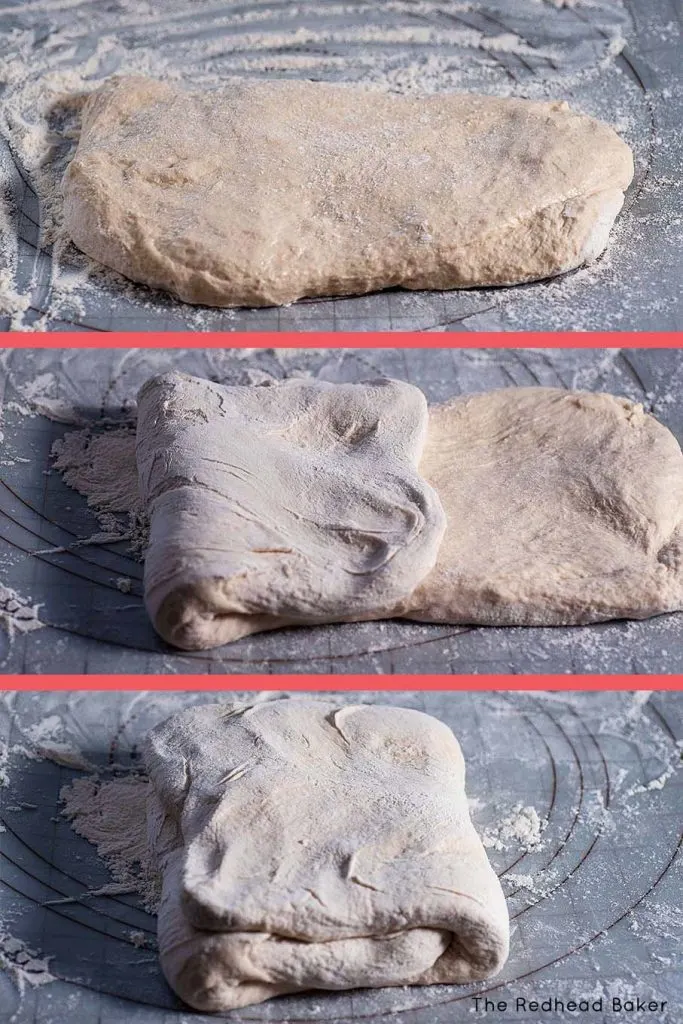
The good news is that shaping ciabatta bread is much easier than most other bread doughs! There's no rolling out, gathering into a ball, or pinching the dough together. It's just a simple letter-fold.
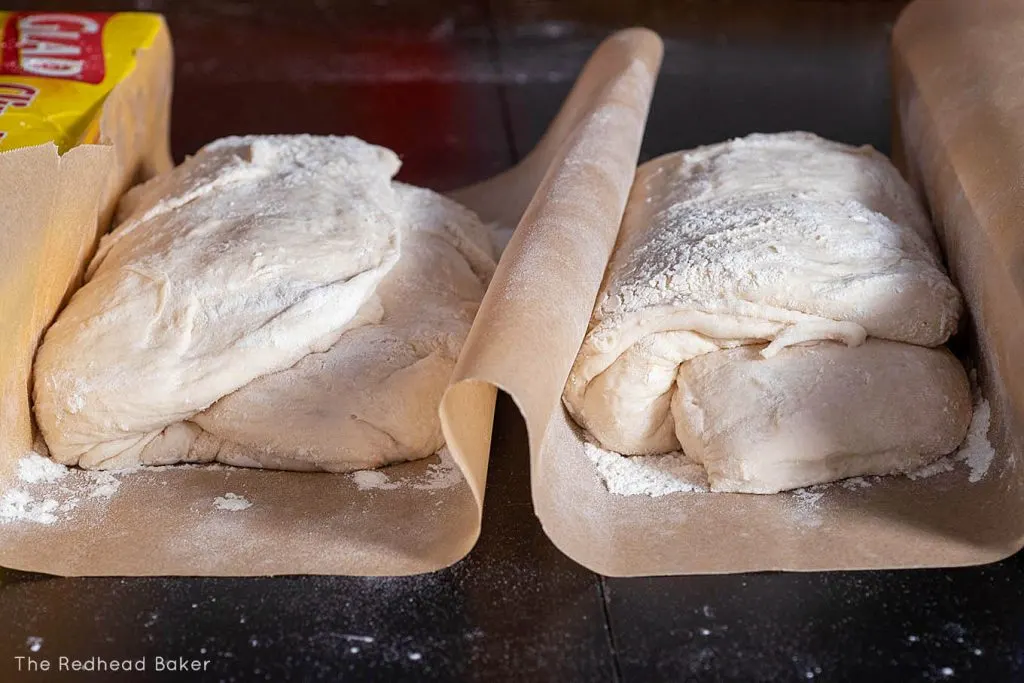
Professional bakers will use a couche (a flour-dusted stiff linen cloth) to proof the dough. Because the linen is stiff, when the dough proofs, it rises up, rather than spreads out. You can recreate this at home with parchment paper, and using something like boxes of tinfoil or plastic wrap on each end.
This bread is delicious on its own, served warm. You can also dip a slice in herbed olive oil. You can also sliced the bread horizontally, and use it as sandwich bread.

Ciabatta Bread
Ciabatta is a rustic, crusty Italian bread. The interior is marked with large air holes. It is delicious served warm, dipped in herbed olive oil.
Ingredients
For the pre-ferment
- 2 ½ cups (11.25 oz/319 g) bread flour
- 1 ½ cups (12 fl oz/355 mL) water, at room temperature
- ¼ teaspoon (.03 oz/.8 g) instant yeast
For the dough
- 3 cups (13.5 oz/383 g) bread flour, plus more for sprinkling
- 1 ¾ teaspoon (.44 oz/12.5 g) kosher salt
- 1 ½ teaspoon (.17 oz/5 g) instant yeast
- 6 tablespoon to ¾ cup (3 to 6 oz/90 to 180 mL) whole milk
- Cornmeal, for dusting
Instructions
- Combine all of the pre-ferment ingredients in a large mixing bowl. Whisk until the mixture resembles very thick pancake batter.
- Cover the bowl with plastic wrap and let sit at room temperature for 4 hours, then transfer the mixing bowl to the refrigerator. Chill for at least 24 hours, and up to 96 hours.
- To make the dough, take the pre-ferment out of the refrigerator 1 hour before beginning to mix the dough.
- In the bowl of a stand mixer, stir together the 3 cups of bread flour, the salt and the yeast with the paddle attachment. Add 6 tablespoons of the milk and the milk. Mix on low speed until the mixture forms a sticky ball, adding more milk a tablespoonful at a time if needed.
- Increase the speed to medium, and mix for 5 to 7 minutes, until the mixture forms a smooth, sticky dough. Switch to dough hook attachment and knead on medium speed for 2 minutes, until the dough clears the side of the bowl but still stick to the bottom.
- Sprinkle an 8-inch by 8-inch square of flour on a clean work surface. Use a dough scraper to transfer the dough from the mixing bowl to the work surface.
- Dust the top of the dough with flour, and pat it into a rectangle. Let it rest about 2 minutes.
- Coat your hands with flour, then lift the dough from each end and stretch it to twice its length. Fold the dough like a letter (take one third of the dough from one end, and fold in toward the middle, then repeat with the third on the other end).
- Mist the dough with nonstick cooking spray, then dust with flour again. Loosely cover with plastic wrap and let rest for 30 minutes.
- Repeat Steps 8 and 9, but this time let the dough rest for 90 minutes. The dough will swell, but not double in size.
- Lay a sheet of parchment, about the size of a baking sheet with one long end closest to you. Dust the parchment liberally with flour.
- Carefully, using a dampened pizza cutter or dampened very sharp knife, cut the dough in half. Try not to burst press down and burst any of the gas bubbles.
- Sprinkle one of the dough rectangles with more flour and using the scraper for extra support, get under the dough and carefully lift the dough onto one half of the prepared parchment.
- Gently fold the dough into a letter again into a rectangle about 6 inches long.
- Rpeeat Steps 13 and 14 with the other half of the dough, placing it on the other half of the parchment. Slide one half of the parchment toward the other, so that a wall pops up between the pieces of dough. Mist the tops of the dough rectangles with nonstick spray and dust with more flour, then cover the dough rectangles with a clean kitchen towel.
- Let the dough proof for 1 hour.
- While the dough proofs, arrange the shelves of your oven in the top and bottom thirds of the oven. Place a baking stone on the top shelf and place an empty baking pan on the bottom shelf. Preheat the oven to 500 degrees.
- Dust a baking peel with cornmeal. Use a bench scraper to gently stretch the dough rectangles to about 9 inches in length and slide them onto the prepared peel. Use the peel to transfer the loaves onto the preheated baking stone. Pour 1 cup of water into the empty baking pan and close the oven door.
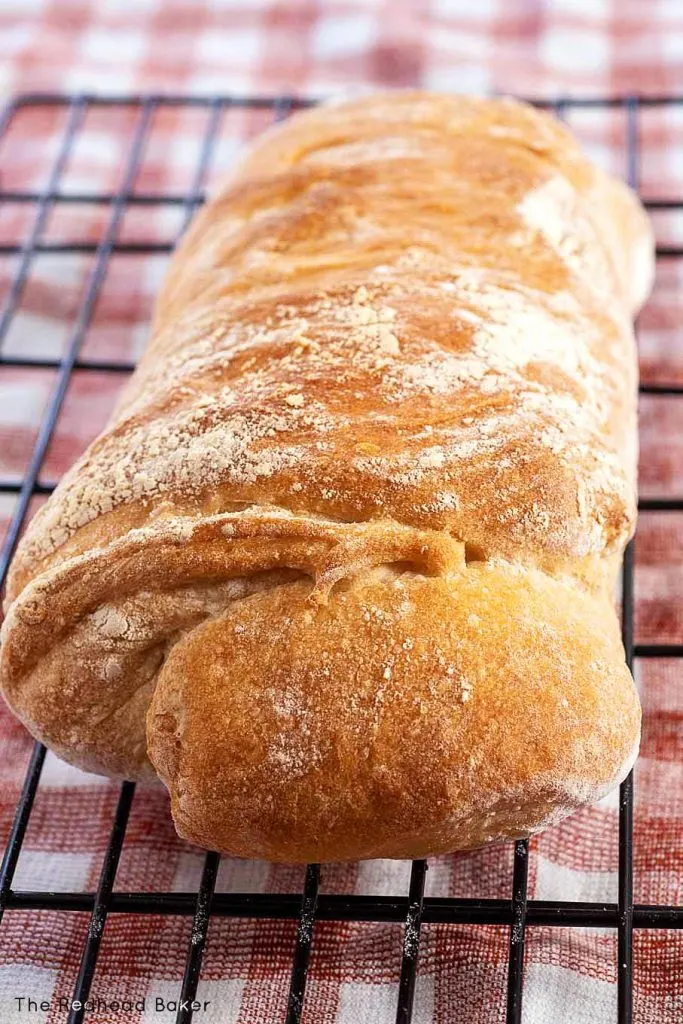
- After 2 minutes, turn the oven temperature down to 450 degrees, and bake for 10 minutes. Rotate the loaves 180 degrees, and bake another 5 to 10 minutes, until baked through (the loaves should be golden brown, hard and crusty).
- Cool on a wire rack for 45 minutes before slicing with a bread knife and serving.
Notes
You can freeze baked bread. Wrap twice in plastic wrap, then place the loaf in a freeze-grader zip-top bag. Place in the freezer for up to 3 months.
Recommended Products
As an Amazon Associate and member of other affiliate programs, I earn a small percentage from qualifying purchases.
-
 SAF Instant Yeast, 1 Pound Pouch
 -
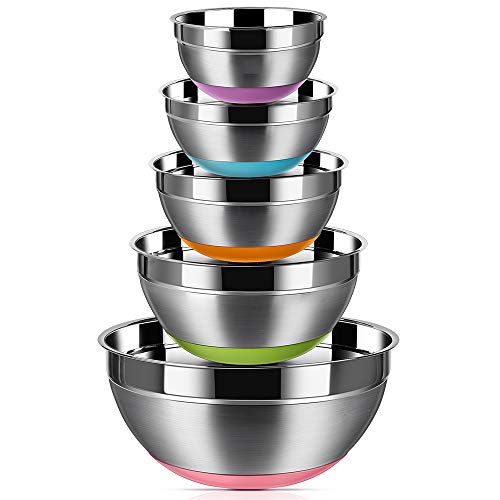 Stainless Steel Mixing Bowls (Set of 5)
 -
 KitchenAid 6 Qt. Professional Bowl-Lift Stand Mixer
 -
 Ateco Bowl Scraper Set, 6-Pieces, Flexible Food-safe Plastic
 -
 King Arthur Flour Precut Parchment Paper, Fits 18" X 13" Pan, 100 count
 -
 Acacia Wood Pizza Peel with Handle (10"x10"x6")
 -
 12”x12” Ceramic Baking Stone
 -
 Stainless Steel Wire Cooling Rack
 -
 J.A. Henckels 8-Inch Serrated Bread Knife
Nutrition Information:
Yield: 32 servings Serving Size: 1Amount Per Serving: Calories: 96Total Fat: 0gSaturated Fat: 0gTrans Fat: 0gUnsaturated Fat: 0gCholesterol: 0mgSodium: 37mgCarbohydrates: 20gFiber: 1gSugar: 0gProtein: 3g
I am not a certified nutritionist. This nutrition information is automatically calculated by third party software and is meant as a guideline only.
Recipe from The Bread Baker's Apprentice by Peter Reinhart